Tools, parts and what you need for guitarmaking

-
Tools & Jigs
-
Tools
- Fretting Tools (Base)
- Pliers
- Sanding Blocks
- Brushes
- Files
- Routers
- Routing Templates
- Templates / Straight Edges
- Fretting Templates - Fret Scale Templates
- Clamps
- Knives
- Measuring Tools
- Tool Sets
- Reamer
- Keys, Wrenches
- Drill Jigs
- Saws
- Drill Bits
- Scrapers
- Bending Irons
- Other Tools
- Fret Hammer
- Fret Pressing
- Fretboard Protector
- Fret Bender & Tang Nipper
- ... More
- Jigs for Luthiers
-
Tools
-
Hardware & Parts
- Necks & Bodies
- Tuners
-
Hardware / Parts
- Truss Rods
- Carbon / Titan Reinforcement
- Trussrod Nuts
- Washer for truss rods
- Bridge Pins
- End Pins
- Bridges & Tailpieces E-Guitar
- Bridges & Tailpieces
- Covers
- Pickguards / Scratch Plates
- Strap Locks
- Bridge Accessories / Spare Parts
- Screws, Nuts, Washers
- Neck Attachement
- String-Ferrules
- Jack plates
- Control Plates
- String Retainer / String Trees
- knobs (pots/switch)
- Relic Parts
- ... More
- Nuts & Saddles
- Fret Wire
- Pickups & Electronics
- Materials & Supplies
- How-to
- Guitar Making
Shop Startpage Guitar Making Luthiery E-Git (CHRISTIAN) Body
The Body
My method of building guitars is quite often the same in the early stages: I do the design on a scale of 1:1, draw with the appropriate templates for milling and then make them. For the body I need the following templates:
- Outline
- Contour start top curvature / thickness "natural binding
- E-Trade: outer contour
- E-Trade inner contour
- Millings pickups, neck
The guitar is a solid electric guitar. Mahogany together with maple gives a presumably heavy body (the raw scantling has already glued about 5kg - way too much!). To avoid this, you can mill so-called "resonance chambers" into the body. That sounds really great, but if you don't overdo it, it's only for weight reduction.
When such chambers are made, it is important to ensure that the stability and sustain are maintained. I take chamber widths around 3-4 cm and partitions of 8 mm. A good distance to the bridge must be kept (4-6 cm).
In the following the different steps of the manufacturing:
The body was glued (top onto bottom), then the contour was sawn out, the outer contour was milled to fit exactly with a flush milling cutter and roughly sanded with sandpaper (120'er). This blank is now further milled.
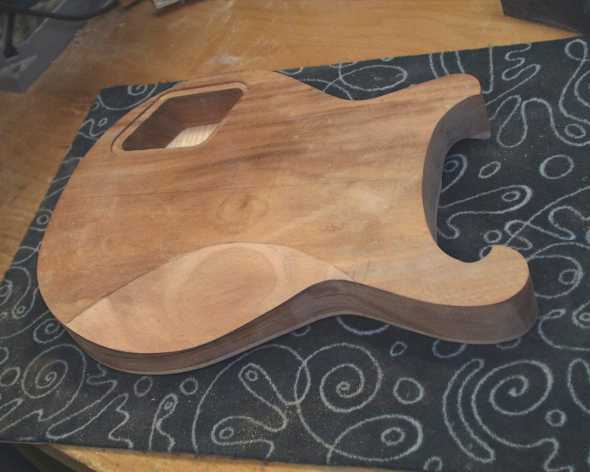
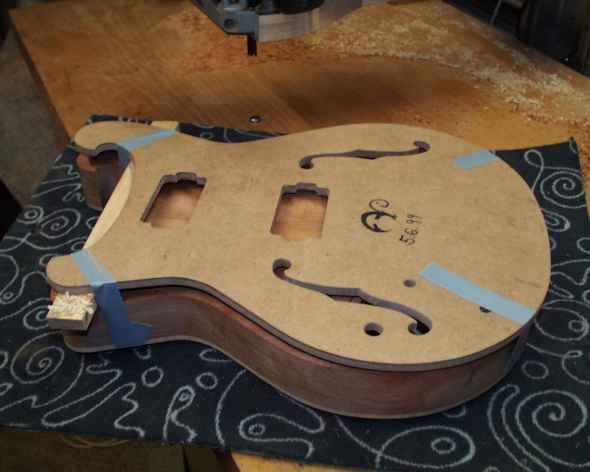
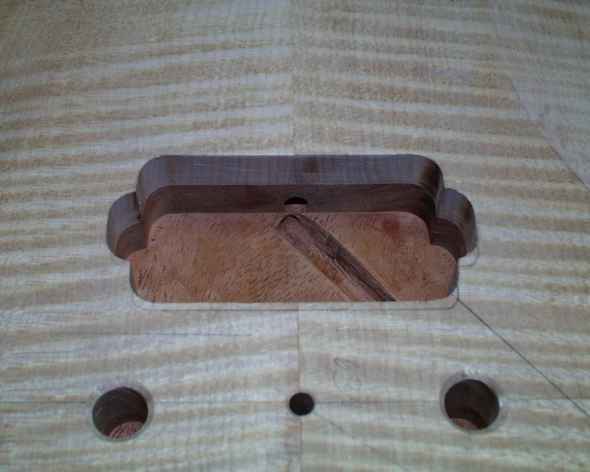
Milling of the electronics compartment:
The ceiling is still flat, so first the electronics compartment and the battery holder are milled out.

Milling of contour approach
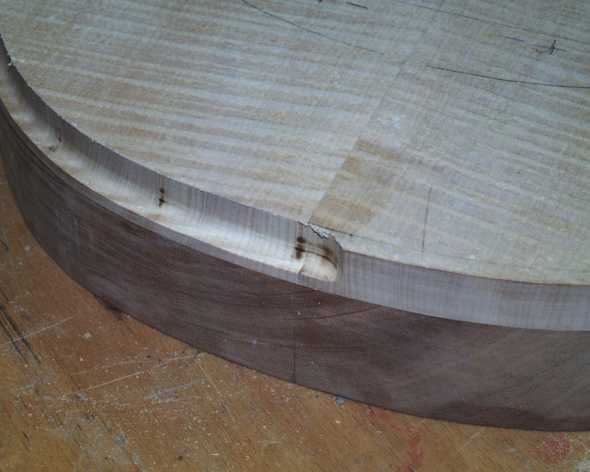
The top measures 19mm and tapers over the whole length to binding strength at the horn front (approx. 6-7mm).
To create the wedge, the ceiling is milled off on one side. For this purpose I fix a piece of wood of appropriate thickness on the thin side behind and thus raise the blank. With a sharp cutter and in several infeeds the wedge is created.
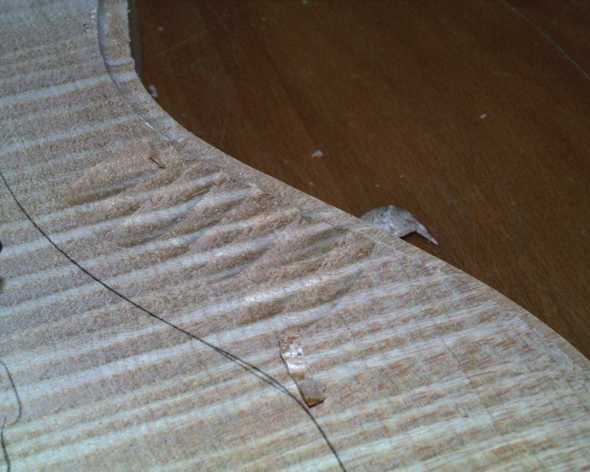
Important: especially curly maple is prone to bursting if too much is milled away - always slowly and the last layer 1-2mm thick.
Now the channel of the contour approach is milled. The starting point of the ceiling fillet must be milled along the outer contour using a half-round milling cutter. I do this using a template and a thrust ring. This way the channel creates a uniformly high finish all around between mahogany and maple - the later binding.
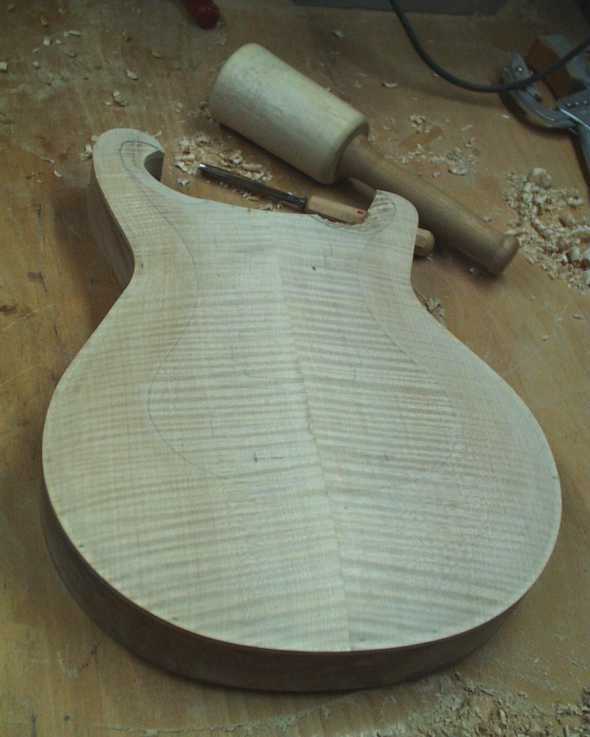
Carving the top
The arched top has a straight surface between the base of the neck and just behind the bridge. This has now been marked and carved with sharp carving irons and planes down to the contour channel.
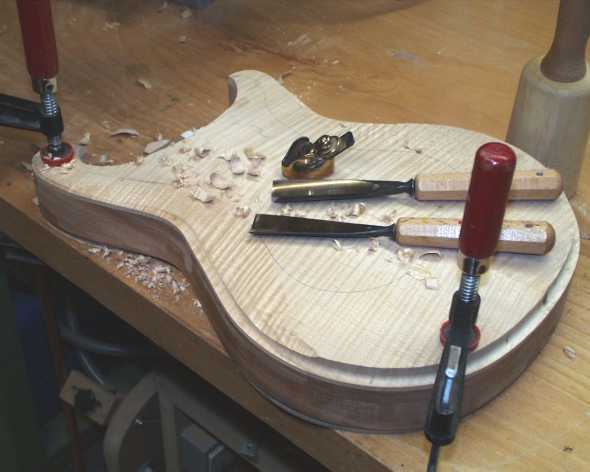
more planing ...
even more carving ...
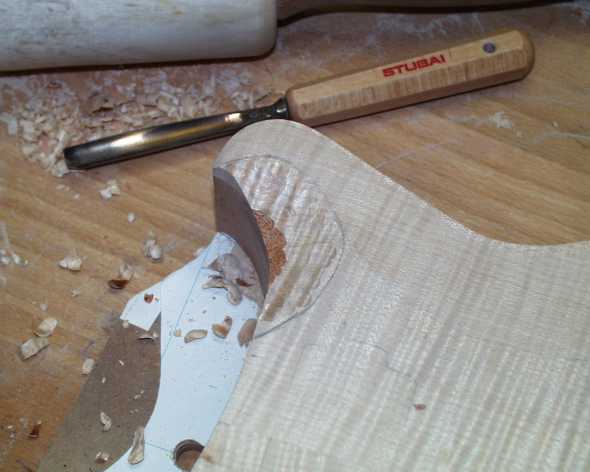
Here the cutaway is carved
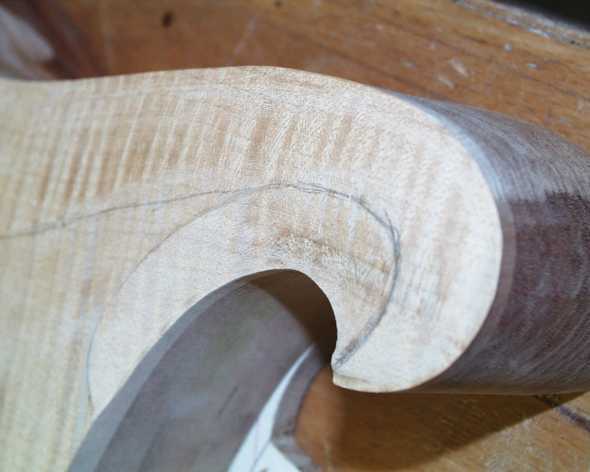
Here the carved upper horn.
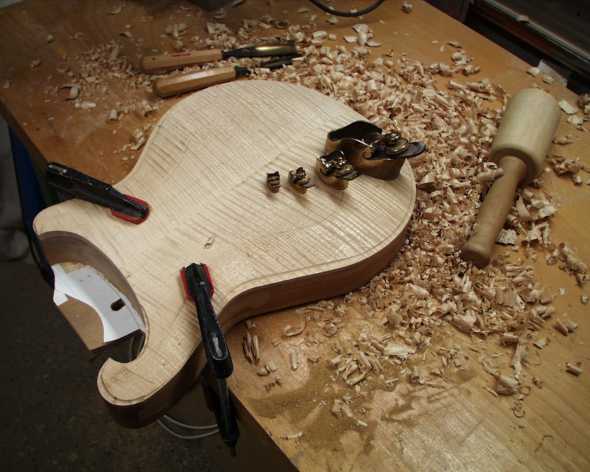
Besides carving, you also have to sand (80'er, then 120'er)
The body back is ergonomically shaped.
The neck is cut. It applies as well to other milling: always free eg drill with Forstner drills - increases the service life of the cutter and the speed of working.
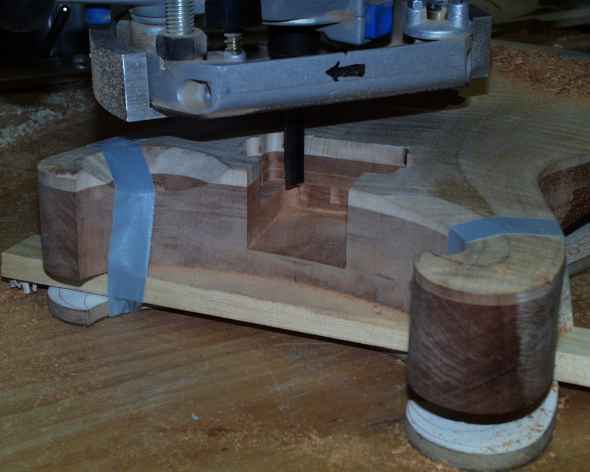
Mounting the cutting template for the pickups
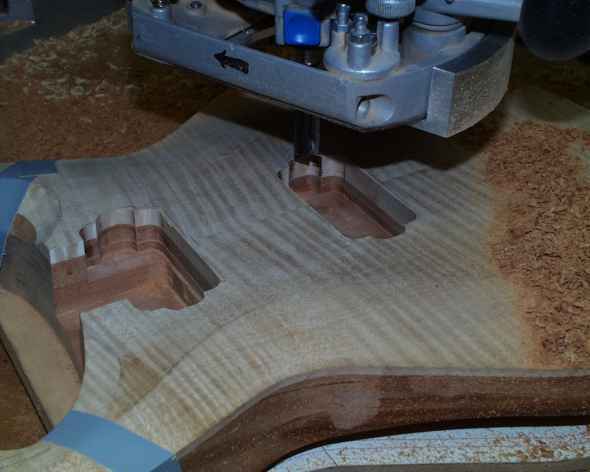
Milling the Pickups
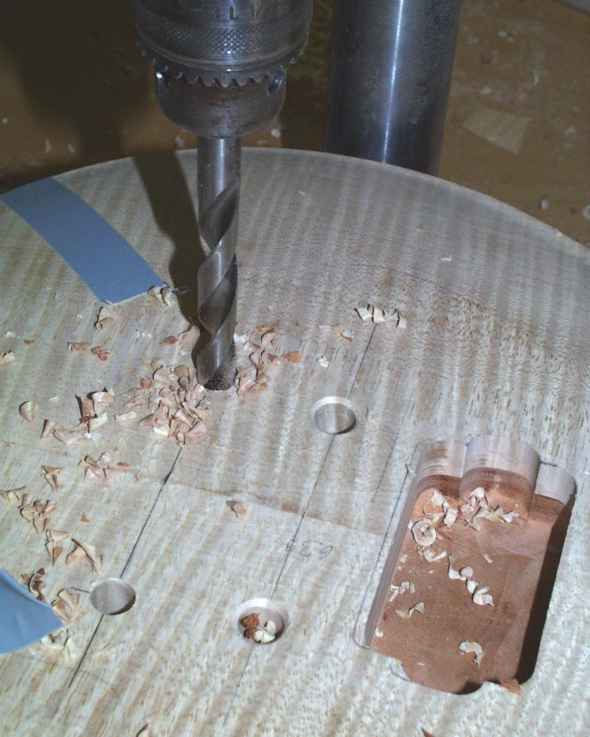
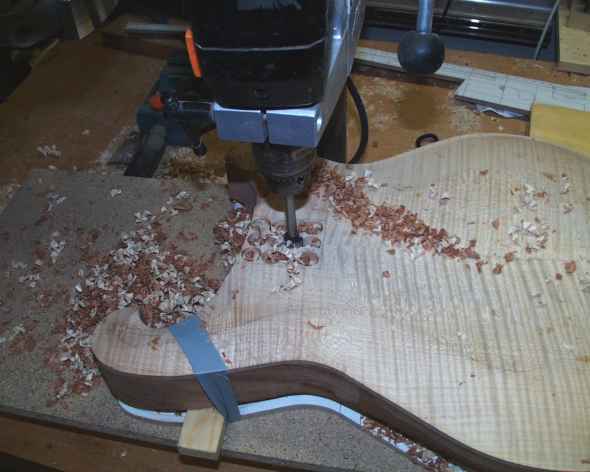
Drilling the holes for the bridge and tailpiece.
Drill holes for the cables (aim a long drill through the hole of the output socket).
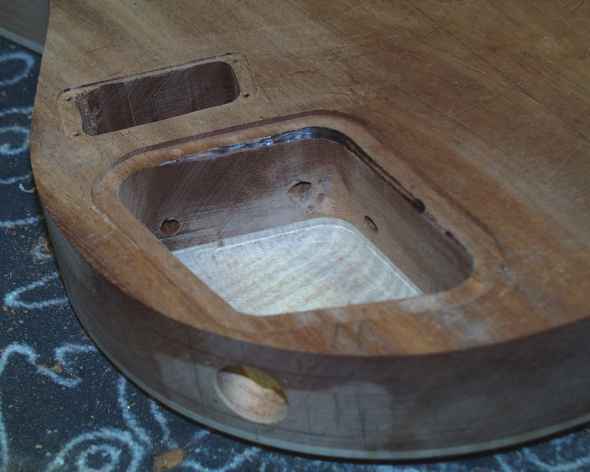
Finished electronic compartment with battery compartment, cable holes (also to the piercing sleeves because of the ground connection!)
Now we continue with the construction of the neck!

|
Rall Guitars & Tools Hauptstrasse Tel +49 (0) 8803-48856-56 Retail Shop: By appointment only
|
Subscribe our Newsletter By subscribing our newsletter you accept our Privacy Policy and Terms and Conditions. |