Tools, parts and what you need for guitarmaking

-
Tools & Jigs
-
Tools
- Fretting Tools (Base)
- Pliers
- Sanding Blocks
- Brushes
- Files
- Routers
- Routing Templates
- Templates / Straight Edges
- Fretting Templates - Fret Scale Templates
- Clamps
- Knives
- Measuring Tools
- Tool Sets
- Reamer
- Keys, Wrenches
- Drill Jigs
- Saws
- Drill Bits
- Scrapers
- Bending Irons
- Other Tools
- Fret Hammer
- Fret Pressing
- Fretboard Protector
- Fret Bender & Tang Nipper
- ... More
- Jigs for Luthiers
-
Tools
-
Hardware & Parts
- Necks & Bodies
- Tuners
-
Hardware / Parts
- Truss Rods
- Carbon / Titan Reinforcement
- Trussrod Nuts
- Washer for truss rods
- Bridge Pins
- End Pins
- Bridges & Tailpieces E-Guitar
- Bridges & Tailpieces
- Covers
- Pickguards / Scratch Plates
- Strap Locks
- Bridge Accessories / Spare Parts
- Screws, Nuts, Washers
- Neck Attachement
- String-Ferrules
- Jack plates
- Control Plates
- String Retainer / String Trees
- knobs (pots/switch)
- Relic Parts
- ... More
- Nuts & Saddles
- Fret Wire
- Pickups & Electronics
- Materials & Supplies
- How-to
- Guitar Making
Shop Startpage Guitar Making Repairs E-Bass Repairs Make a bass saddle
Make a bass saddle
Here I show how to re-file a bass saddle. A tool set consisting of a round file and saw blade can be found under item number 19050003.
For a variety of reasons, these need to be replaced. If they are plastic saddles, the outer ends often break away and the strings lose their guide. But normal wear and tear from years of playing can also be the cause.
You can also buy prefabricated plastic saddles on the spare parts market - I advise against simple, white injection-molded parts. They are quite cheap and it looks like you just have to glue it back in place, but for good playability and tunability it needs to be machined in height as well as the grooves of the string guide. I recommend bones as saddle blanks. If you buy them cut to size (e.g. 6x8x45mm) you can work and adjust them quite well with simple tools like saw, files and sandpaper. Graphite saddles are also OK, just a little harder to work with.
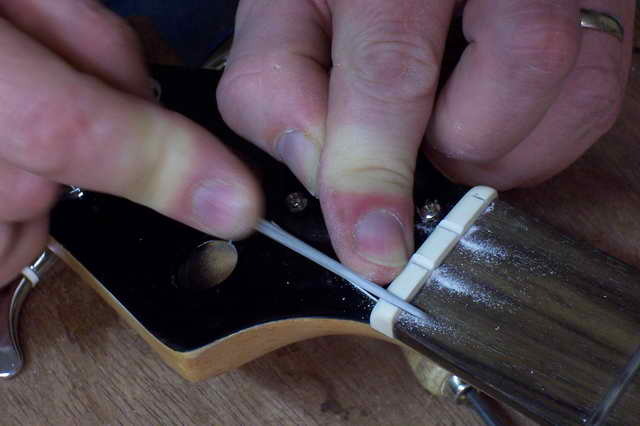
The saddles are usually glued with a little glue. A small tap with a hammer from the fingerboard side loosens this. The groove is cleaned with chisel and file from glue residues, the measure for the new blank is taken.
The first thing to do is to adjust the thickness. I do it on the grinder, but it can also be done manually. Often the bone blanks come only roughly ground. Every outer surface has to be fine ground up to grit 320. If the groove is 6mm, the blank will fit at 5.9mm after grinding.
If the saddle now fits cleanly, you can mark the width with the pencil and saw it off. With the file you adjust the ends so that there is no noticeable protrusion.
Now comes the saddle height. First I make a line along the top of the fingerboard. This gives me the contour of the fretboard, the radius. Parallel to this, the strings run offset. Add the fret height (about 1.5mm) and each string should be about halfway in the saddle: so add another 1.5mm on the low string. The blank is now roughly filed to the final height. You can now also round off the sides and the surface to the machine heads also falls after 1mm in an arc to the back.
 |
 |
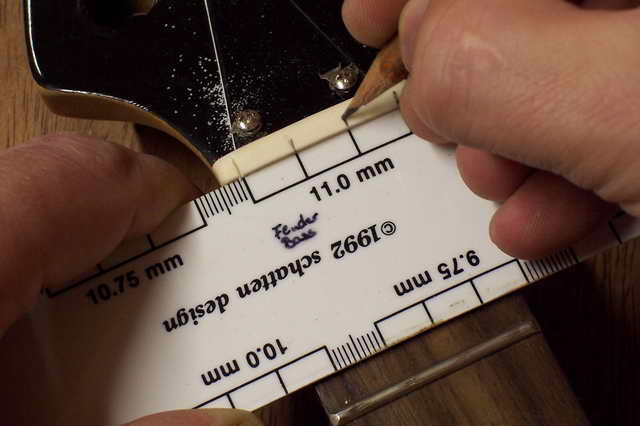
Depending on the width of the neck on the saddle, draw the string spacing. The usual dimensions are around 11mm. But here you can also calculate and vare yourself. Laterally you need about 4.5mm to the fingerboard and the distance between them is divided by the (number of strings -1). So for the 4-string by three (4,5 + 4,5 + 33 = 42mm).
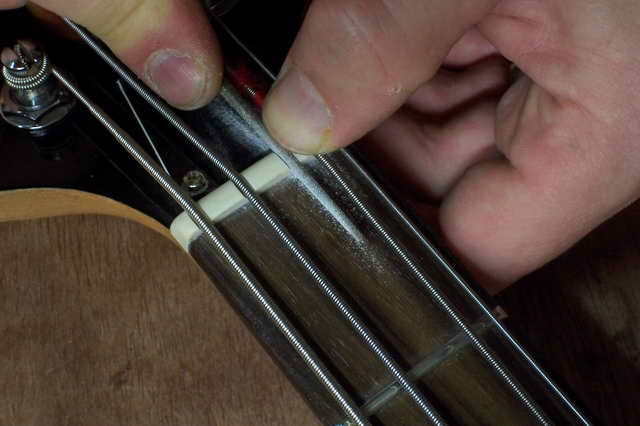
With a hacksaw, about 1mm wide, cut the notches a little bit. Then file semicircular notches with the small round file according to the string thicknesses. The file tapers towards the front. At which point the correct string diameter is filed is best measured beforehand with the caliper.
 |
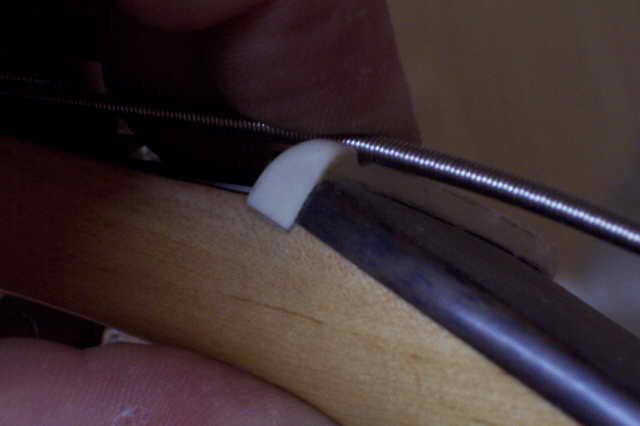 |
The correct string height is so that the string passes over the first fret with a little air and does not buzz when free-swinging. So you stop pre-filing when the lowest point of the notches are about 0.3mm above fret height.
 |
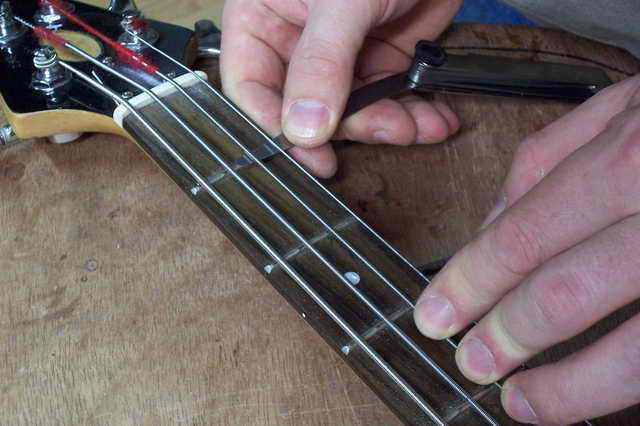 |
The strings are wound and slightly pre-tensioned and now comes the fine work. If you press on the 3rd fret of the string, there must be some air (2-3/10mm). To do this, look from the side against a light background and visually check the gap. You can check this with the feeler gauge - practically you notice it when the 3rd fret is pressed and you tap the string on the first fret with your index finger. You will hear a small "clack" sound.

|
Rall Guitars & Tools Hauptstrasse Tel +49 (0) 8803-48856-56 Retail Shop: By appointment only
|
Subscribe our Newsletter By subscribing our newsletter you accept our Privacy Policy and Terms and Conditions. |