Shop Startpage Guitar Making Luthiery 000-Standard Top
The Guitar Top
The wood for the guitar top is made of two symmetrical boards glued together in the middle. When you buy the top tonewood, you can get raw, sawed boards. These boards must then be laid together at the joint and marked with a triangle, for example. The marking is necessary because it is quite possible that the grain deviates and you can leave out unattractive areas and then have an orientation when gluing whether the paired boards fit together. Now the joint has to be worked meticulously with the planer. If you hold the two joints together, a good joint is shown by the fact that a slight negative pressure on the planing surfaces creates a small counterforce if you want to separate the halves again. If you hold the boards together and then hold them against the light, no light may shine through at any point.
The boards are then glued with slight lateral counterpressure (a stop bar on the left and right and 3x2 wedges on one side) and a very small weight (approx. 2x 300g) on top. Remove the excess glue immediately and leave it overnight. Now the top has to be planed to thickness. This can be done in the traditional way with a plane, scraper and sandpaper, but you can also go to a carpenter's store and have this work done by a cylinder sander. It is important to ensure that the sanding belt used is clean and without any baking, because elevations on the sanding belt leave pressure marks on the soft wood, which unfortunately often only come to light after the painting.
Depending on the stiffness of the ceiling wood, the ceiling thickness is evenly between 2.5 and 3mm.
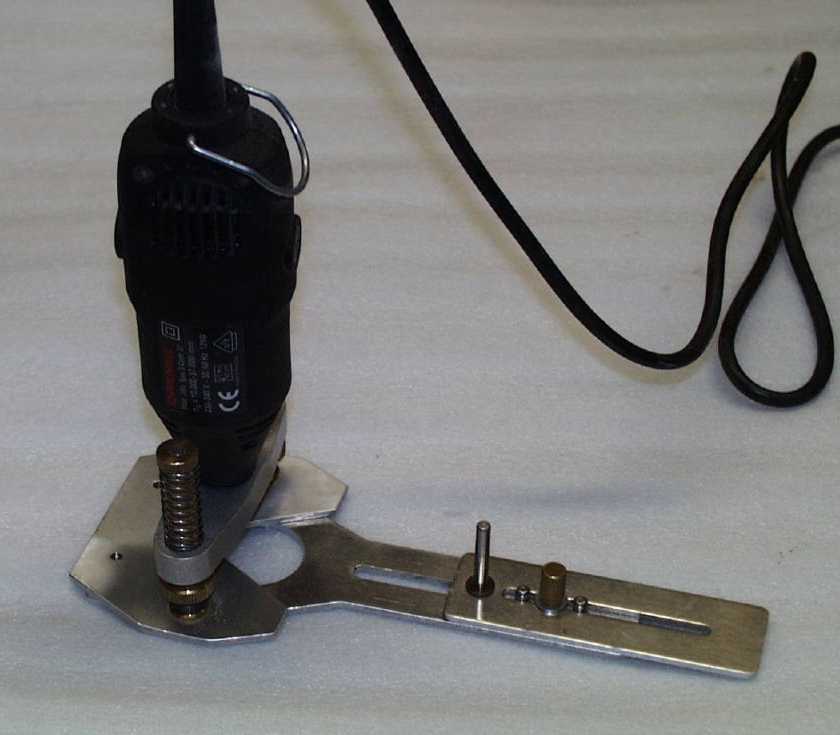
The production of the sound hole decoration must be done before the sound hole is cut out. These decorations are usually made of wood shavings or shell limestone. Both have in common that they are glued into a channel. To make the rosette, place the ceiling template on the wood, draw a center line and then the center of the sound hole and drill a hole there to guide a circle cutter. To make the channel for inserting the chip, I use a special circle cutter that can be screwed to the Dremel Multi. Using a cylindrical pin as the center of the circle, the platform of the Dremel is turned in the radius of the rosette chip. This radius can be adjusted again via a slotted hole.
 |
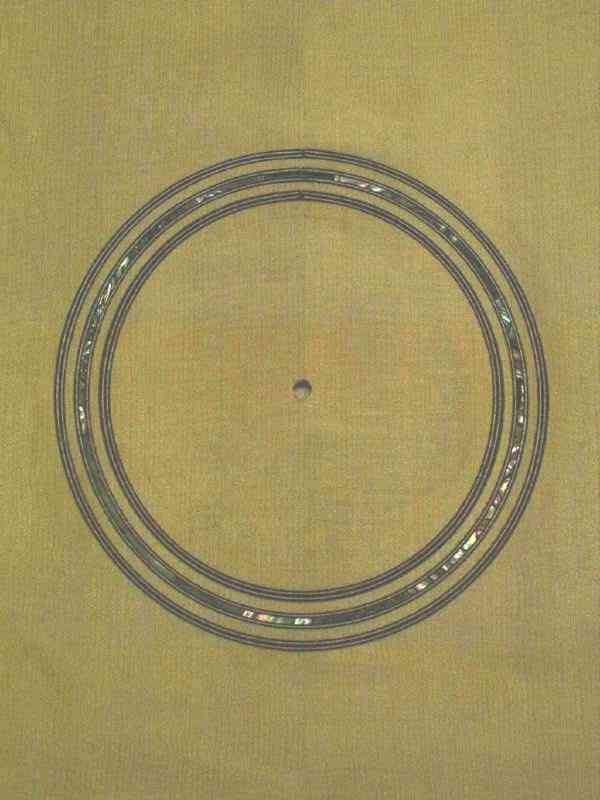
I use a pattern of three inlays with different radii for the sound hole decoration, the middle inlay being a bordered abalone shell inlay. The single patterns are built up from a black-white-black (bwb for black white black) real wood veneer (ebony, maple, ebony) with a width of 3x 0,5mm=1,5mm. To make it look like more, I take the bwb-pattern twice and therefore need a milling channel of about 3,15mm width. The 1.5 or more tenths are needed as a clearance to use, glue has to be in between. Also you must not forget that the white glue contains water and this makes the wood swell. This is also a request to wet only small pieces with glue and not to flood the channel with glue!
 |
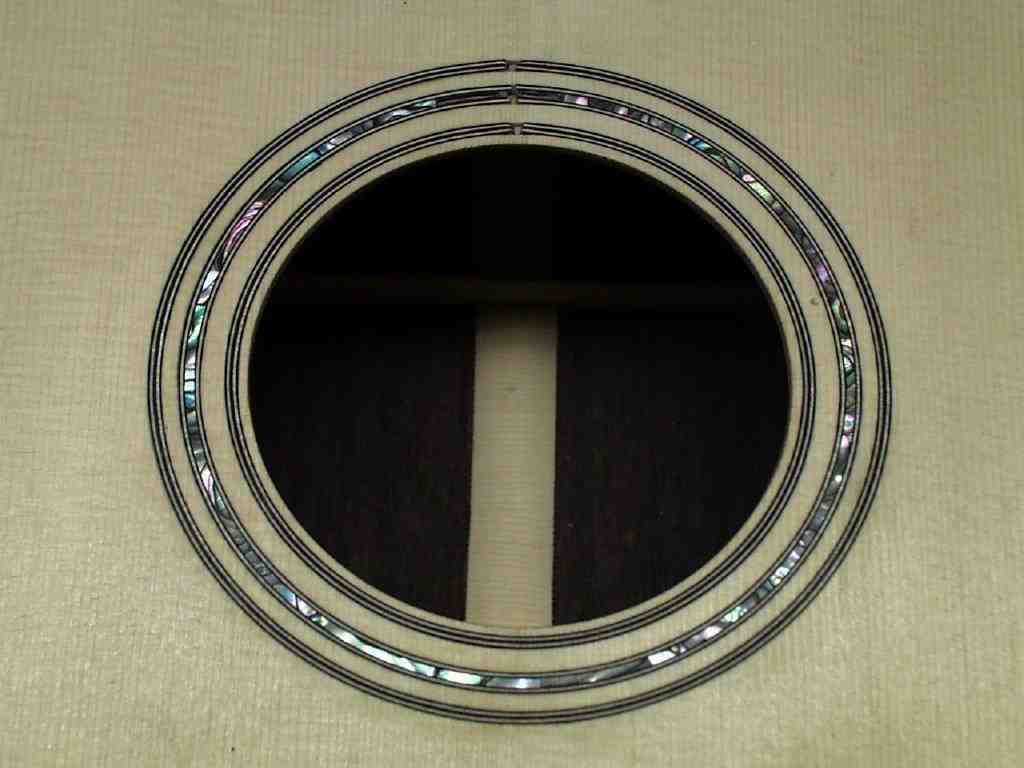
The middle pattern is done with a trick. The borders consist of bwb stripes next to the abalone which is about 1.5mm wide. The production of the channel is the same as described before, only the gluing is not done at once. Instead of the abalone pieces a strip of plastic is inserted as a dummy. If the glue dries over night, you take out the strip of plastic carefully and insert the shell strips with a little glue into this now perfectly fitting channel - ingenious and simple. To prevent the strips from lifting out of the channel, I put something heavy on top of them. To prevent it from sticking, I put a layer of plastic in between.
When it is certain that all the glue has hardened, use a file, plane, scraper and sandpaper to adjust the sound hole decoration of the ceiling. Take care that the black dust is not spread unnecessarily on the wood, because the soft spruce top readily accepts the dark pigments and this would create a dark shadow around the sound hole. Now the circle cutter has to be adjusted to 98mm diameter and the sound hole is cut out by gradually lowering it. Make sure that the ceiling is fixed before cutting out the sound hole, because without the guidance of the cylindrical pin there is a high risk that the cutter will leave the circular path and then damage the ceiling.
 |
On the inside of the ceiling I now draw the position of the beams. For this purpose I lay the plan of the inside of the ceiling, drawn on pressboard and then cut out, on the ceiling wood. With the pencil I make small lines on the outer line which I then connect to a map. I took the measurements of the beams themselves from the plan and cut them out of stiff, standing spruce wood. With the plane they are then straightened to the exact measurements. The surface facing the inside of the ceiling must be worked off in a semicircle. Both the floor and the ceiling can withstand more load if the surface is not completely flat but has a dome-like structure. The curvature is 25' (feet) = 7620mm for the ceiling and 15' (feet) = 4572mm for the floor. This is about 6mm deflection at a distance of 60cm from the ceiling. The following picture shows my "glued canopy" with a ceiling insert. I had a MDF-board with the 25' radius made by CNC-machine. For the semicircular preparation of the bracing I glue a strip of sandpaper into the arching with double-sided adhesive tape and with a few strokes of the wood on the sandpaper the battens are ready.
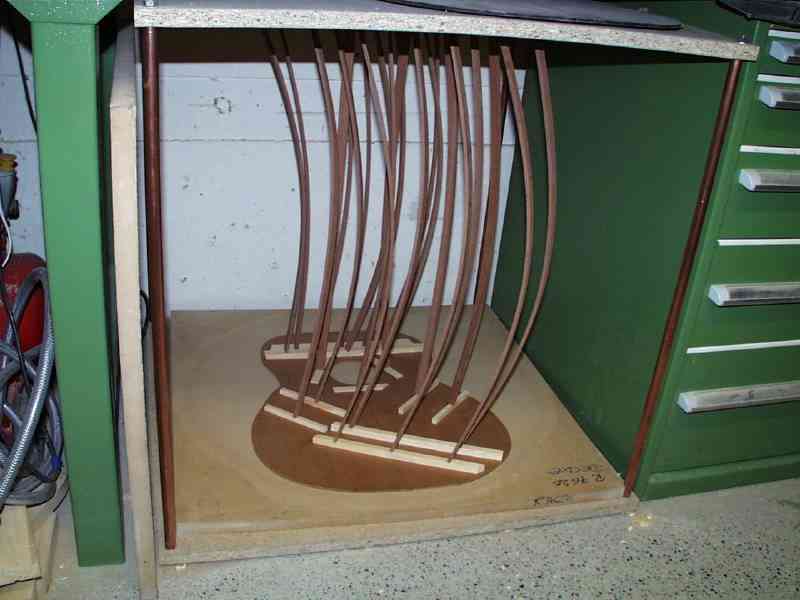 |
The "Himmel" is a proven device. With thin hardwood strips, enough pressure is applied, but not so much that the wood is crushed. I built this thing so big that I can put it under the workbench. When the ceiling beams are ready prepared, first the small finger beams, then the lower fan beams and then the upper beam are put on. The X-beam crosses just below the sound hole. The crossing must be designed as a precisely fitting plug connection which must then be glued. Use a fine saw to cut in half the thickness of the beam at the resulting edge, the same on the counter beam. The fit is reworked with a file until the X-beams can be plugged together under light pressure. After completion of the ceiling gluing, this X-crossing is reinforced crosswise (approx. 1.3 cm wide) with glue-impregnated cotton strips. Since the X-beams have a projection of about 2-3mm, the small beams must be cut to length on this projection, and the chisel must be used to carefully cut a 45° angle. Now you put the X-beams on and draw the cross points of the small beams there and chisel them out accurately. This overlapping creates a tonal bridge and at the same time the string tension is distributed more evenly. When the X-beams are finished, they can be glued on as well. The inside of the soundboard must be cleanly finished. Any dirt and any protruding shavings can spoil the tone. Especially when gluing, the excess glue must be removed immediately after the hardwood strips have been fixed. Here is a little tip from me: next time you are at McDonalds, take some straws with you! I cut them diagonally at one end and with this tip I drive along the glue line. Like a shovel the straw takes up the glue. With a cloth I empty it from time to time - simple and effective! The rest is done with a damp cloth.
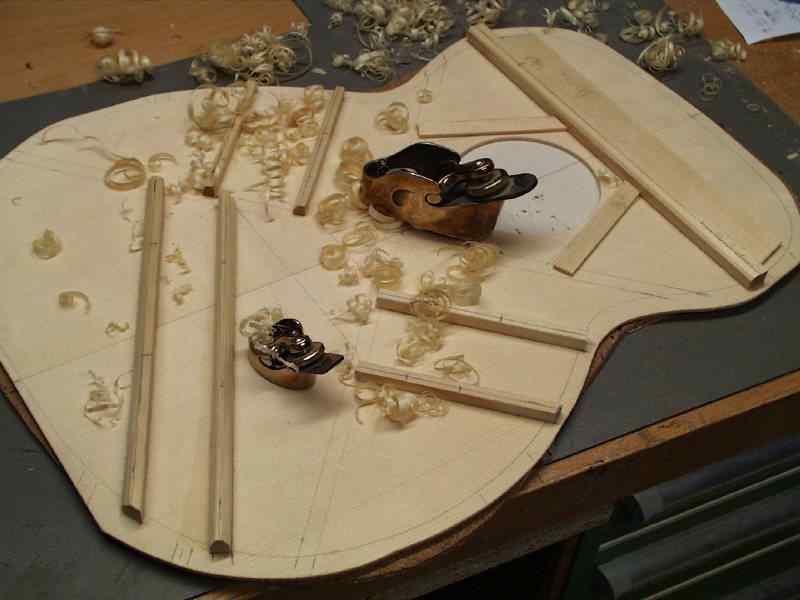 |
As you can see in the picture above, the profile of the bars is only created after gluing. With small IBEX planes and chisels the widths and heights are adjusted. If you take the ceiling after the gluing and the rough adjustment of the ceiling profiles and tap the sound off, you can rework the bracing with the plane with a little feeling here and there and make it even easier. This work is called "scallopping". After profiling, the inside of the ceiling must be finely sanded with 150 grain sandpaper.


