Tools, parts and what you need for guitarmaking

-
Tools & Jigs
-
Tools
- Fretting Tools (Base)
- Pliers
- Sanding Blocks
- Brushes
- Files
- Routers
- Routing Templates
- Templates / Straight Edges
- Fretting Templates - Fret Scale Templates
- Clamps
- Knives
- Measuring Tools
- Tool Sets
- Reamer
- Keys, Wrenches
- Drill Jigs
- Saws
- Drill Bits
- Scrapers
- Bending Irons
- Other Tools
- Fret Hammer
- Fret Pressing
- Fretboard Protector
- Fret Bender & Tang Nipper
- ... More
- Jigs for Luthiers
-
Tools
-
Hardware & Parts
- Necks & Bodies
- Tuners
-
Hardware / Parts
- Truss Rods
- Carbon / Titan Reinforcement
- Trussrod Nuts
- Washer for truss rods
- Bridge Pins
- End Pins
- Bridges & Tailpieces E-Guitar
- Bridges & Tailpieces
- Covers
- Pickguards / Scratch Plates
- Strap Locks
- Bridge Accessories / Spare Parts
- Screws, Nuts, Washers
- Neck Attachement
- String-Ferrules
- Jack plates
- Control Plates
- String Retainer / String Trees
- knobs (pots/switch)
- Relic Parts
- ... More
- Nuts & Saddles
- Fret Wire
- Pickups & Electronics
- Materials & Supplies
- How-to
- Guitar Making
Shop Startpage Guitar Making Luthiery The project "Indie" Finishing
"Indie" Gitarre Finishing
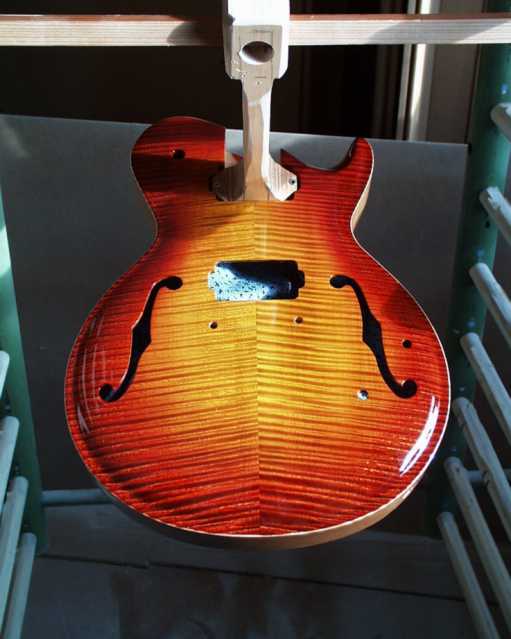
Since I already have several descriptions about varnishing guitars on my site, I won't go into detail about the preparation and execution here. But what I would like to present here is the sunburst that can be seen in the following picture.
A more detailed explanation of painting can be found here: Techniques - Varnishing
 |
Color application can be done differently. On the one hand under the varnish, i.e. directly on the wood. Furthermore, colored lacquer can achieve the desired effect during the first layers of lacquer. Also the combination of both techniques, e.g. basic coloring with one color and colored lacquer layers make the sunburst. This is for example the way Fender or other big brands create their bursts
If you dye by applying colored varnish, it covers the wood grain, depending on its intensity. This is a certain disadvantage, but it can be an advantage that you have a wide range of colors to choose from, and surface varnish is easier to repair than defective stains in case of wood damage.
This sunburst shown here is applied pure on wood. The advantage is that the wood grain is shown to its full potential. The application of the stain was done with a Sata "Mini-Jet" spray gun and an approx. 7-8cm round jet at approx. 2 bar. The top coat was applied with a Sata "Jet 90" HLVP with a 1.8mm nozzle at 3.5 bar and full wide jet. Everything clear?
 |
 |
The following steps were performed for sunburst staining: (before each color application, test stain on similar wood with the same preparation and re-color if necessary!!!)
- Sanding up to 240'er sandpaper
- Soak and let dry
- Grinding up to 340'er
- mixing of the water stain: basic color yellow (one stitch brown, some red)
- Stain the ceiling with yellow (the one you can see in the middle, in the picture the hardware is dry plugged together)
- let it dry
 |
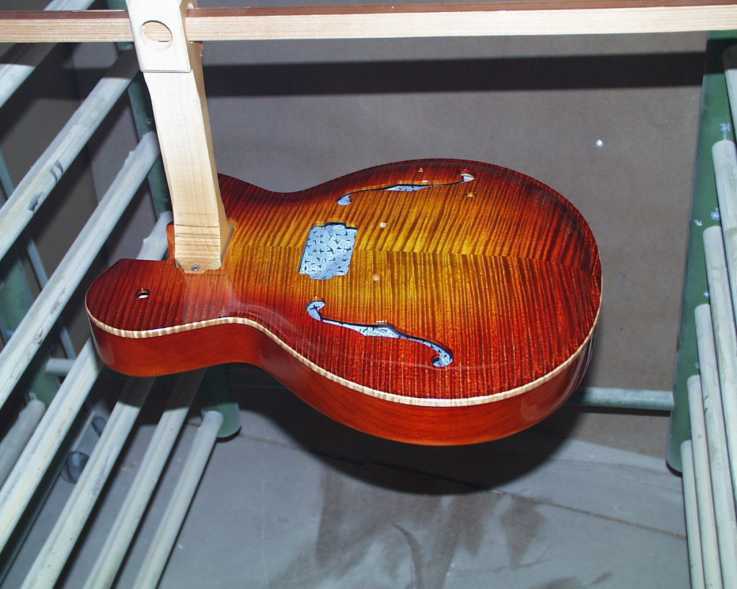
- Mixing of the water stain: Light orange (yellow, red, one stroke brown)
- Paint the first inner burst strip light orange with the spray gun, holding it from inside to outside
- mixing of the water stain: orange-red (red, yellow, one stroke brown, black)
- Paint the second inner burst strip light orange with the spray gun, holding it from inside to outside
- mixing of the water stain: dark red (red, yellow, brown, black)
- Paint the third inner burst strip light orange with the spray gun, holding it from inside to outside
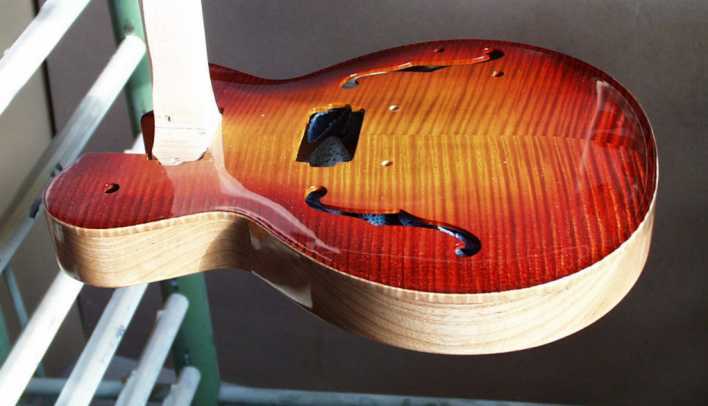
If the border is not dark enough with the third outermost strip, simply place a fourth one with even more black carefully at the border. I used water stain here, also alcohol stain is great. If you use nitro as a top coat, you have to take into account that it might take color from the stain and color something like that (think of the cherry-red of the ES guitars from Gibson). If you have enough stain (150-200ml) for the first burst strip, you can continue to color the rest until the last strip. But if you make it too dark, you have to mix new ones.
If you are not sure how to protect the frames from staining, it is very clever to prime or mask them beforehand.
 |
 |
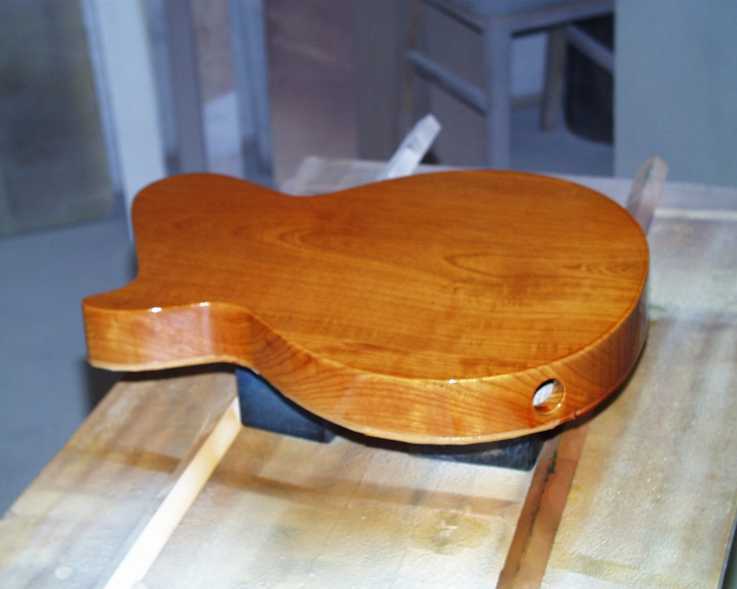
Not to forget the lower part of the body. Since Swamp-Ash is a very large-pored wood, it must be filled before painting. I did this with clear PU primer. Between each application there had to be 8 hours drying time. Then came an intermediate sanding. This is repeated until there are no more pores.
After the first two layers of clear varnish with high gloss varnish, the natural binding was taped with 6mm wide 3M flex tape and the body back was sprayed with dyed brown-orange varnish. All in all there were then 8 layers of PU-lacquer on it. After 3 weeks of drying, I polished the guitar and then started the assembly.

|
Rall Guitars & Tools Hauptstrasse Tel +49 (0) 8803-48856-56 Retail Shop: By appointment only
|
Subscribe our Newsletter By subscribing our newsletter you accept our Privacy Policy and Terms and Conditions. |