Tools, parts and what you need for guitarmaking

-
Tools & Jigs
-
Tools
- Fretting Tools (Base)
- Pliers
- Sanding Blocks
- Brushes
- Files
- Routers
- Routing Templates
- Templates / Straight Edges
- Fretting Templates - Fret Scale Templates
- Clamps
- Knives
- Measuring Tools
- Tool Sets
- Reamer
- Keys, Wrenches
- Drill Jigs
- Saws
- Drill Bits
- Scrapers
- Bending Irons
- Other Tools
- Fret Hammer
- Fret Pressing
- Fretboard Protector
- Fret Bender & Tang Nipper
- ... More
- Jigs for Luthiers
-
Tools
-
Hardware & Parts
- Necks & Bodies
- Tuners
-
Hardware / Parts
- Truss Rods
- Carbon / Titan Reinforcement
- Trussrod Nuts
- Washer for truss rods
- Bridge Pins
- End Pins
- Bridges & Tailpieces E-Guitar
- Bridges & Tailpieces
- Covers
- Pickguards / Scratch Plates
- Strap Locks
- Bridge Accessories / Spare Parts
- Screws, Nuts, Washers
- Neck Attachement
- String-Ferrules
- Jack plates
- Control Plates
- String Retainer / String Trees
- knobs (pots/switch)
- Relic Parts
- ... More
- Nuts & Saddles
- Fret Wire
- Pickups & Electronics
- Materials & Supplies
- How-to
- Guitar Making
Shop Startpage Guitar Making Repairs Repairing Jazz Guitars Framus 5/51
Framus 5/51 Studio
Here I show the repair of a jazz guitar from the early 70s.
She came from the flea market with two broken necks and was to annoy me more than I thought.
 |
Both fractures were directly in the glue joint of the neck wood.
Fracture at the base of the head:
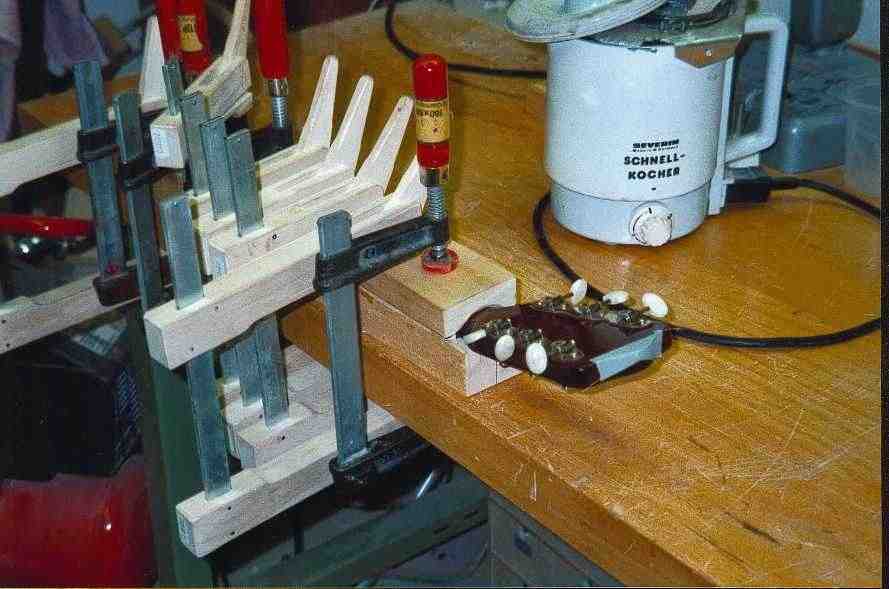
I spread the joint, cleaned it and glued it. Touch up with super glue, sanded the whole thing down and polished ready to go.
Break at the base of the neck:
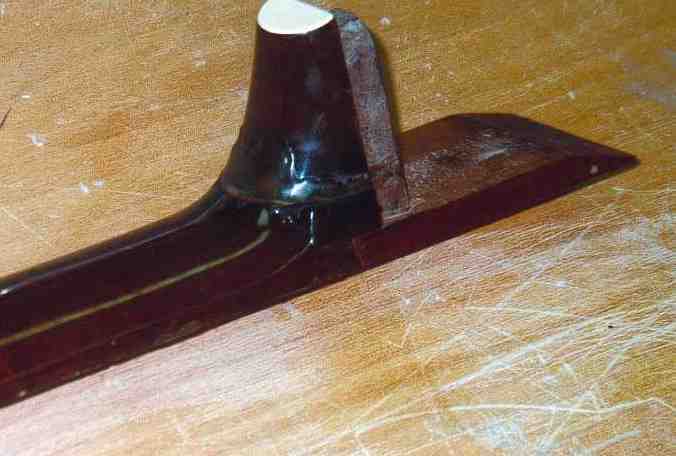
Softened the glue joint with hot steam, removed the neck with wedges into the joint as well as from the body. A 12mm dowel supports the foot. Cleaned everything of glue residue, checked neck angle and glued again.
After 4 weeks, the joint opened again. This time I removed the whole neck including the foot with steam (squeezing device a la Stewart MacDonald's). The thing from the beginning, glue, touch up etc. This time I left the guitar strung up in my living room for observation. And oh horror, again. I then looked at the force ratio and you can also see from the above picture that there is only 12mm clearance from the glue joint to the top, and the neck foot is very small so there is very little glue area. The dowel alone can no longer withstand the string tension.
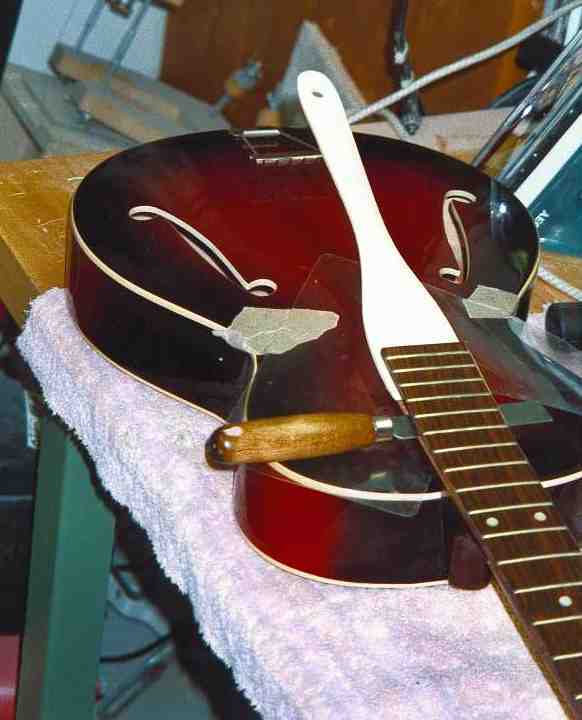 |
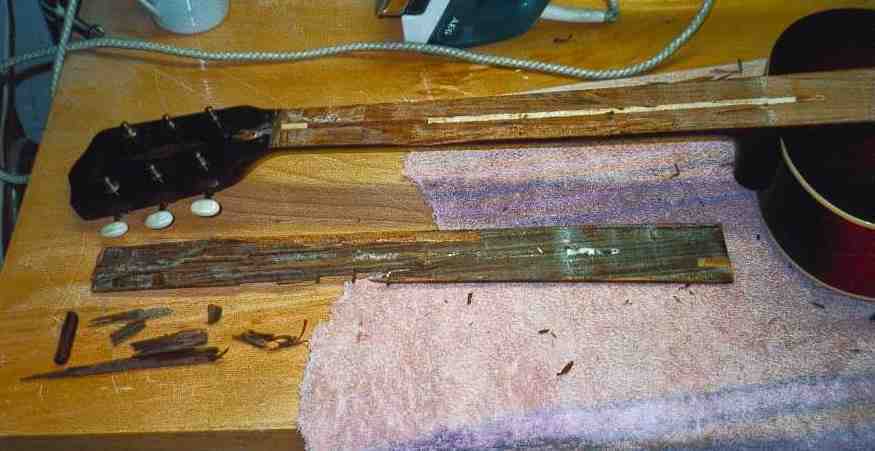
Next, I decided to bolt the neck base in place. To do this, I removed the fingerboard, and I'm still annoyed about the lousy fingerboard wood.
Here happened to me namely a not rare phenomenon with cheap woods:
the knife catches in the grain under the fingerboard and, if you don't manage to get out of the grain back to the glue line, can split and tear off the fingerboard.
 |
A way out here would be to repair it by cutting the fingerboard next to the body junction (10th fret). One saves the danger just described. I too thought if the rest went down as well as the beginning of the fingerboard....
What followed now is a hell of a job:
- Making a new fingerboard, binding, dots, sidedots
- gluing, fretting, dressing
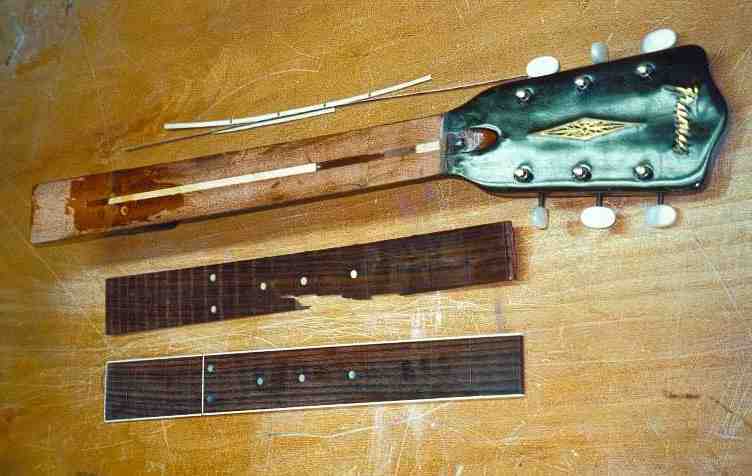 |
Here in the picture you can see besides the new fingerboard also one of the reasons why the neck base broke: the cover strip of the truss rod was not there, I filled the hole with epoxy. You can also see the countersunk screws in the neck base (please pre-drill!).
 |
Care must be taken when checking the neck angle that some plywood tops are not braced and will easily give 3-5mm after stringing. By removing chips and adjusting to the new neck angle, the transition looked like this:
Gluing the fingerboard with hide glue:
 |
The neck got a partial paint job, touch up with brown colored DD lacquer and looked the best it ever has!
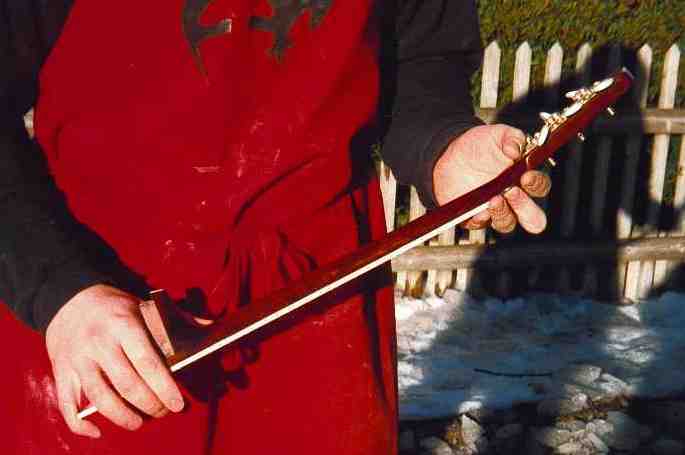 |
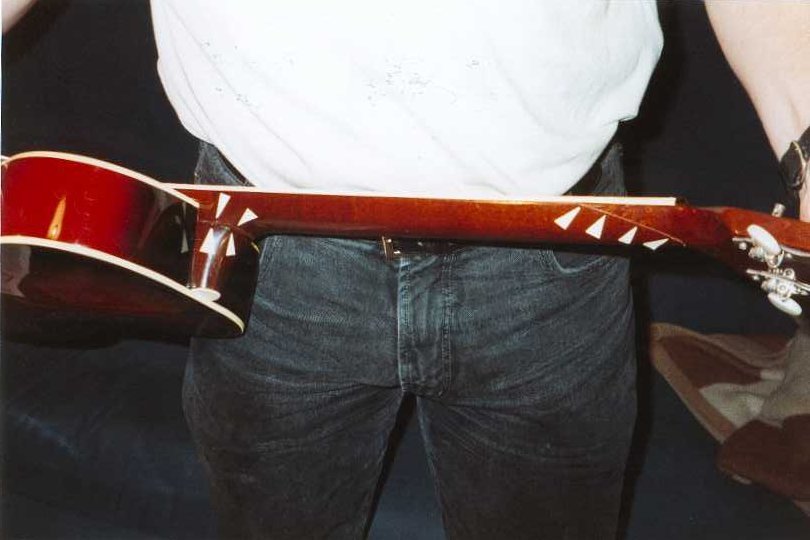
The finished result with and without strings:

|
Rall Guitars & Tools Hauptstrasse Tel +49 (0) 8803-48856-56 Retail Shop: By appointment only
|
Subscribe our Newsletter By subscribing our newsletter you accept our Privacy Policy and Terms and Conditions. |