Tools, parts and what you need for guitarmaking

-
Tools & Jigs
-
Tools
- Fretting Tools (Base)
- Pliers
- Sanding Blocks
- Brushes
- Files
- Routers
- Routing Templates
- Templates / Straight Edges
- Fretting Templates - Fret Scale Templates
- Clamps
- Knives
- Measuring Tools
- Tool Sets
- Reamer
- Keys, Wrenches
- Drill Jigs
- Saws
- Drill Bits
- Scrapers
- Bending Irons
- Other Tools
- Fret Hammer
- Fret Pressing
- Fretboard Protector
- Fret Bender & Tang Nipper
- ... More
- Jigs for Luthiers
-
Tools
-
Hardware & Parts
- Necks & Bodies
- Tuners
-
Hardware / Parts
- Truss Rods
- Carbon / Titan Reinforcement
- Trussrod Nuts
- Washer for truss rods
- Bridge Pins
- End Pins
- Bridges & Tailpieces E-Guitar
- Bridges & Tailpieces
- Covers
- Pickguards / Scratch Plates
- Strap Locks
- Bridge Accessories / Spare Parts
- Screws, Nuts, Washers
- Neck Attachement
- String-Ferrules
- Jack plates
- Control Plates
- String Retainer / String Trees
- knobs (pots/switch)
- Relic Parts
- ... More
- Nuts & Saddles
- Fret Wire
- Pickups & Electronics
- Materials & Supplies
- How-to
- Guitar Making
Shop Startpage Guitar Making Luthiery The project "Indie" Body
The Body Construction
Since I am writing the construction of this guitar as a follow-up article to the red guitar, I don't use many words to describe the individual steps of the process, which I already described in detail there. I will gladly answer any special questions that might arise.
The body of the semi-acoustic guitar places at least two important demands on the builder. Firstly, to conduct the sound quickly and hold it for a long time and secondly, to be as solid as necessary - not as possible!
This subtle difference acts between weight, sound and stability. The body is therefore constructed like a light but stable box, with bottom (5 mm), side walls (15 mm) and top (5-19 mm). Since the middle part of the solid wood hardly contributes to the stability, it can be worked out (there is also air in a box!). Bottom and side walls are made of a one-piece piece of wood. Of course the sides and back could be worked separately - but I didn't do it for sound reasons (glue joint = vibration hindrance).
On the load side, where the strings are stretched, a somewhat stronger top carved from hardwood is glued on as a counterpart to the back. For aesthetic reasons I use a beautifully figured sycamore maple. Some companies would call this "ten top" or AAAA and put a huge price tag on top.
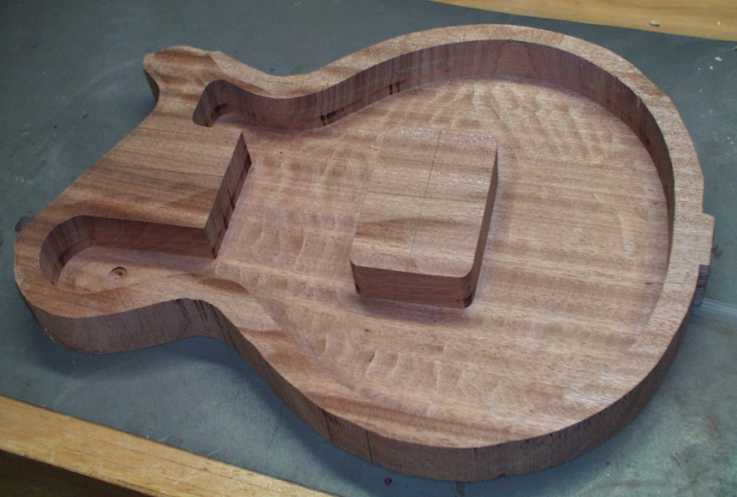
Exactly at the place where the bridge has its place, a wooden block connects floor and ceiling. It is also called sustain block. It gives the string attachment the necessary holding power and then transmits the tension force to the other supporting elements. It plays an extremely important role in the sound behavior, because it is the sustain memory, it prevents the rapid decay of the tones.
 |
 |
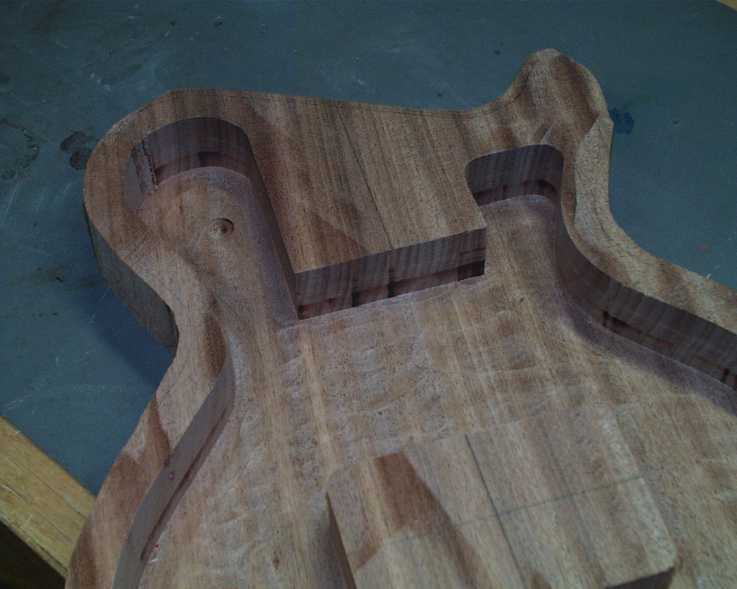
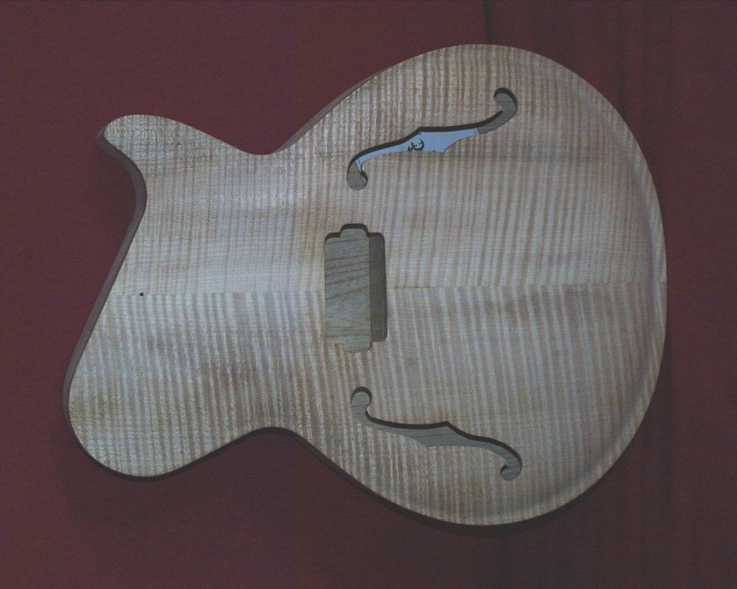
Coarse internal milling
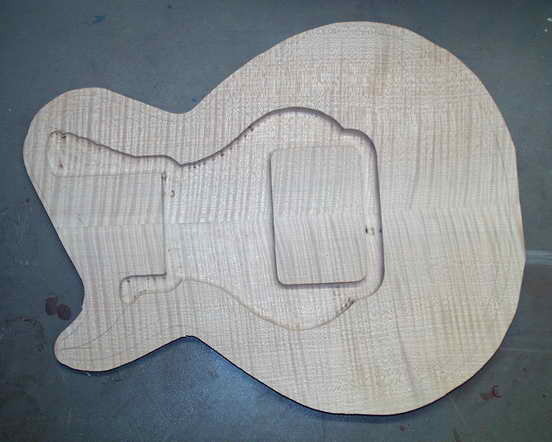
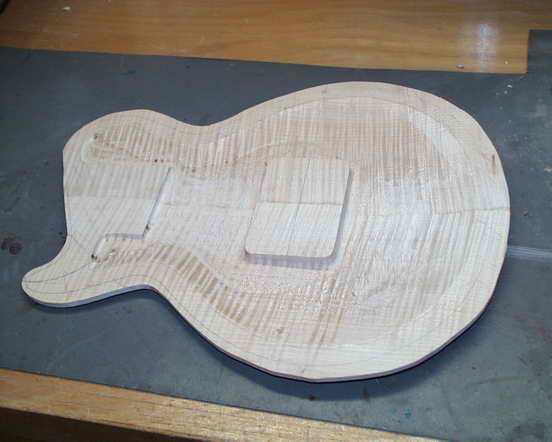
The lower part of the body is, as mentioned above, milled in one piece and from the full. I used a template and a router (with a 20 mm carbide cutter) to work it out again. You can save a lot of time and mill sharpness if you pre-drill the whole surface with a Forstner bit.
 |
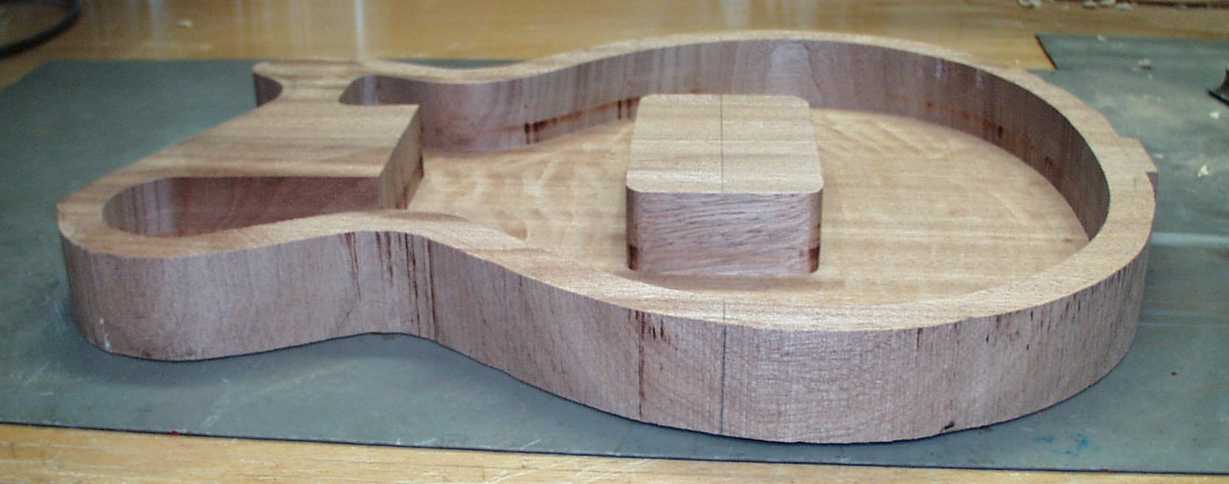 |
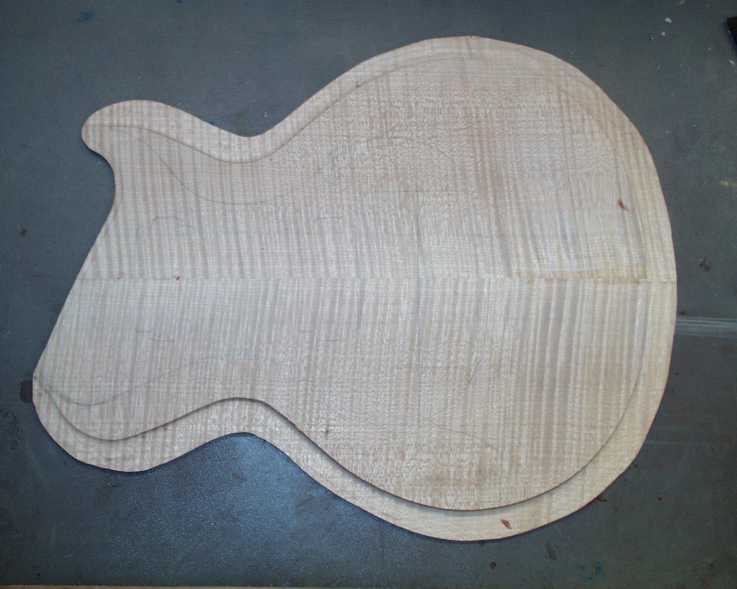
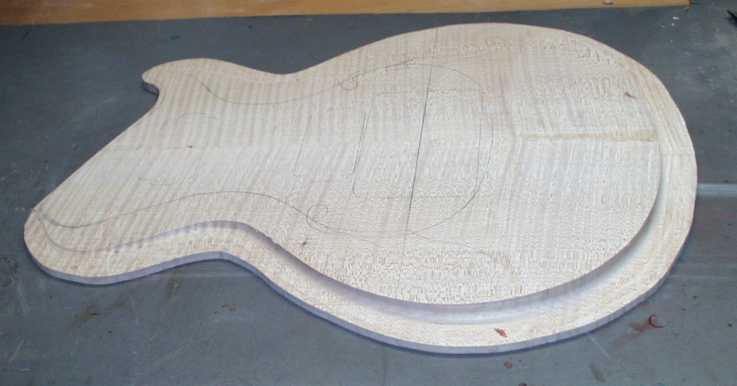
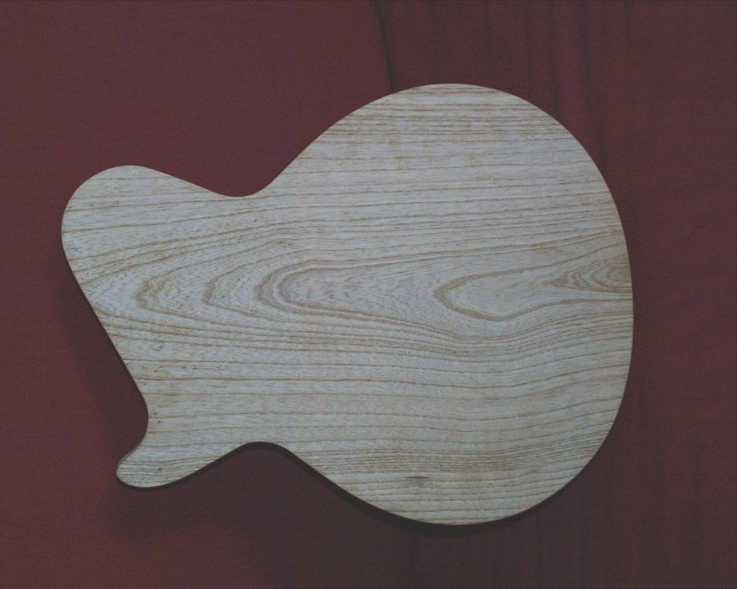
The board for the bottom part is straightened and planed and sanded exactly parallel to the surface to a thickness of 43 mm. the outer shape is only roughly pre-cut with a band saw, but is precisely drawn with a pencil (center line, outer shape). The inner contour is then milled exactly to 5 mm floor thickness, the inner walls are then sanded cleanly.
It should always be noted that wood is sometimes unpredictable. If, as here, so much material is milled away on one side from a single piece of wood, tension is created which, in the worst case, will distort the beautiful and expensive scantling! This can be remedied by gluing the top on soon (I mean immediately or a few hours later) or by clamping it firmly with screw clamps.
(For explanation: I have photos of mahogany and Swamp-Ash bodies here. I took one of them for testing and then I used the ash-body).
 |
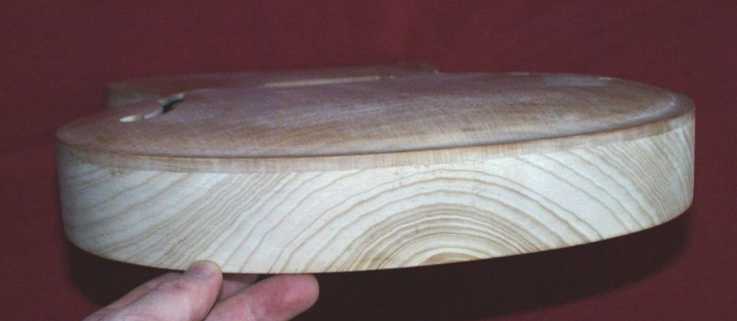
At the end of the body and also on the ceiling there is a small wooden heel which serves to hold a small centering pin as gluing aid. When the top and bottom are finished inside and outside, they are placed on top of each other and fixed together with a small drill. With a little glue and enough clamps for the frame both are then glued together. When the glue is dry, the final outer contour is created on the template with a flush milling cutter.
The following photos show the already glued and finished carved and sanded body. For sanding, it should be noted that all edges are broken, except for those of the ceiling / frame transition. Because the guitar gets a so called "natural binding", that means a transparent varnished binding. In order for this to show to the fullest, the first mentioned edge is rounded only after the staining process.
 |
 |
 |
Before gluing the ceiling, it is important to remember that the "nameplate" is glued in before.

|
Rall Guitars & Tools Hauptstrasse Tel +49 (0) 8803-48856-56 Retail Shop: By appointment only
|
Subscribe our Newsletter By subscribing our newsletter you accept our Privacy Policy and Terms and Conditions. |