Tools, parts and what you need for guitarmaking

-
Tools & Jigs
-
Tools
- Fretting Tools (Base)
- Pliers
- Sanding Blocks
- Brushes
- Files
- Routers
- Routing Templates
- Templates / Straight Edges
- Fretting Templates - Fret Scale Templates
- Clamps
- Knives
- Measuring Tools
- Tool Sets
- Reamer
- Keys, Wrenches
- Drill Jigs
- Saws
- Drill Bits
- Scrapers
- Bending Irons
- Other Tools
- Fret Hammer
- Fret Pressing
- Fretboard Protector
- Fret Bender & Tang Nipper
- ... More
- Jigs for Luthiers
-
Tools
-
Hardware & Parts
- Necks & Bodies
- Tuners
-
Hardware / Parts
- Truss Rods
- Carbon / Titan Reinforcement
- Trussrod Nuts
- Washer for truss rods
- Bridge Pins
- End Pins
- Bridges & Tailpieces E-Guitar
- Bridges & Tailpieces
- Covers
- Pickguards / Scratch Plates
- Strap Locks
- Bridge Accessories / Spare Parts
- Screws, Nuts, Washers
- Neck Attachement
- String-Ferrules
- Jack plates
- Control Plates
- String Retainer / String Trees
- knobs (pots/switch)
- Relic Parts
- ... More
- Nuts & Saddles
- Fret Wire
- Pickups & Electronics
- Materials & Supplies
- How-to
- Guitar Making
Shop Startpage Guitar Making Luthiery E-Guit (Semi - red) Body
Manufacturing the Body
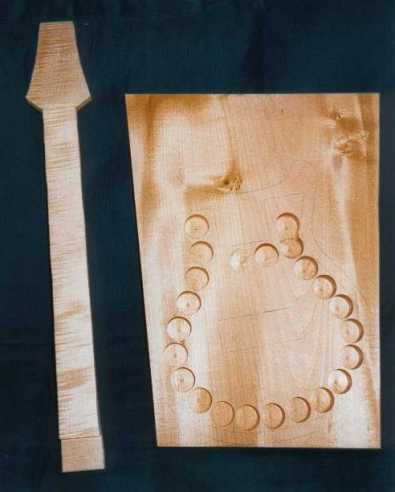
I planed and sanded the lime tree blank to 44mm thickness. I drew the outline with the template and drilled out the rough edges with a Forstner bit. I milled the inside of the frames with the thrust ring and the router.
 |
 |
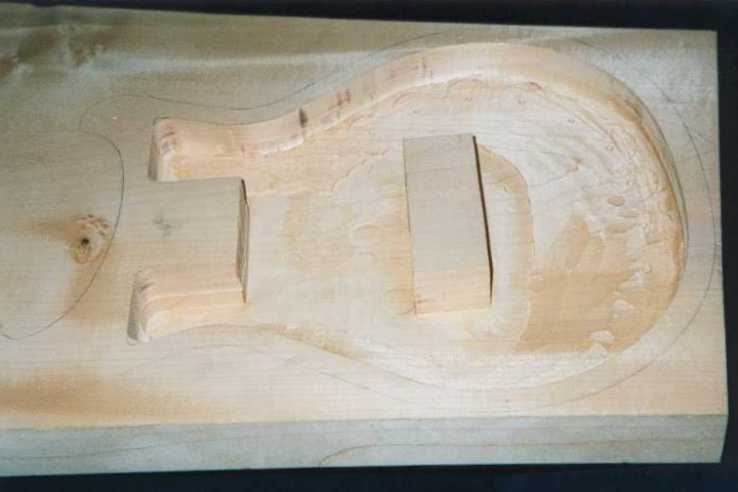
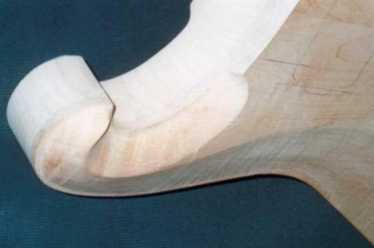
Both top and bottom have a raised, straight surface in the middle area. Here the wood thickness is 5mm. I solved this by milling everything to the depth of the frame first, then I milled the middle area to the final depth with another template. With the chisel and planer the resulting heel is carved away.
 |
 |
 |
 |
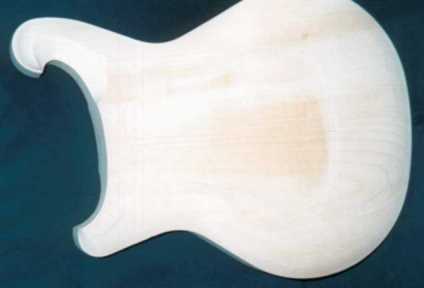
The processing of the ceiling is the same as that of the floor. On the left picture below you can see the pre-milled steps. The picture beside shows the finished carved and sanded still open body.
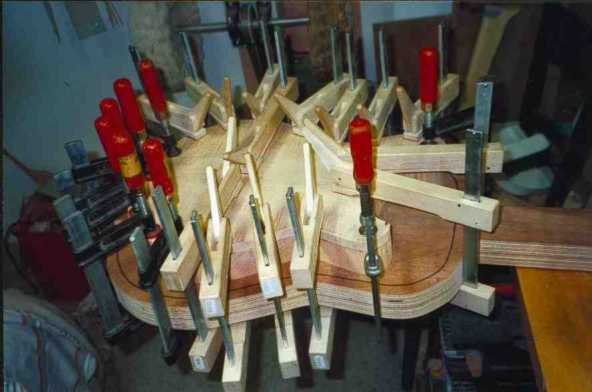 |
When the top is glued to the floor, it is important that the two fit together perfectly. I have marked the halves and fixed them with two nails and the corresponding holes to each other. The body is glued together with many screw clamps and white glue.
 |
 |
The binding is only indicated in color. The strip between the glue edge and 6mm of the top wood is protected from paint. In order to achieve this strip exactly, a radius cutter is used to mill a shoulder above the 6mm.
 |
 |
 |
 |
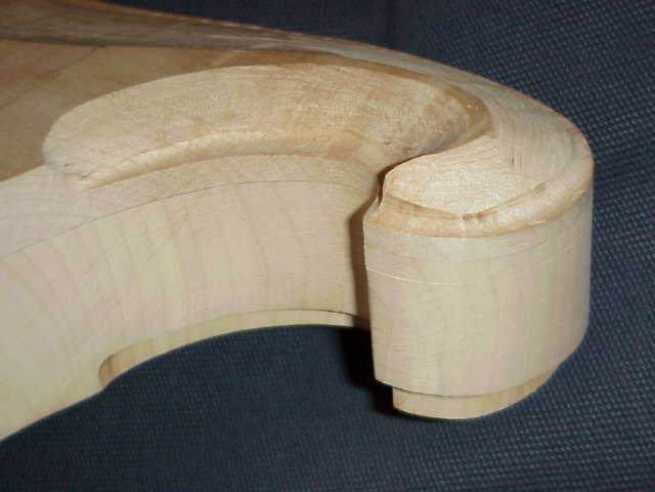
With further carving irons, small planes, the transition between the flat surface and the heel for the binding is carved away.
 |
 |
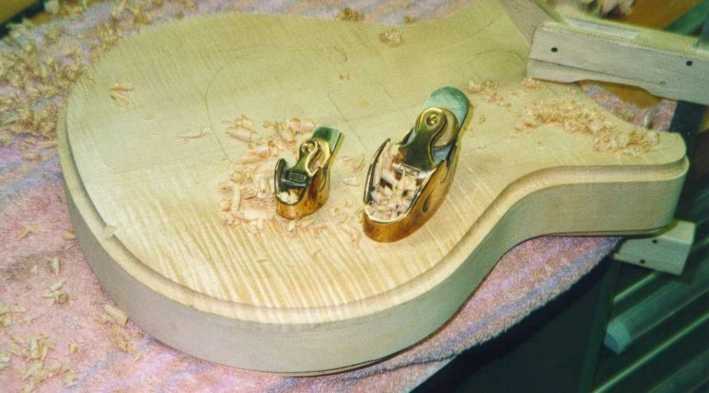
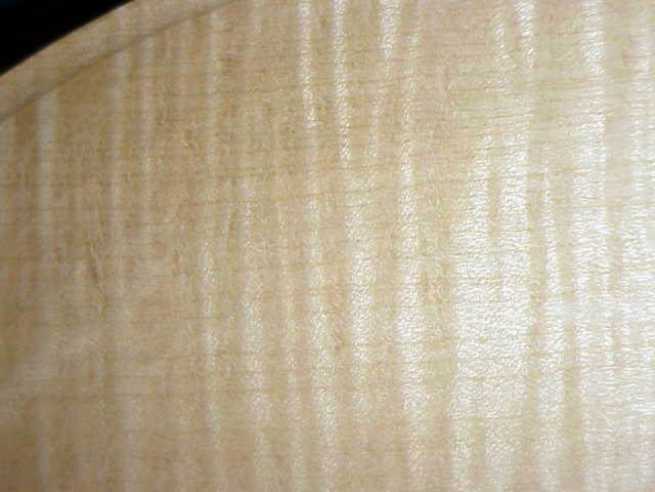
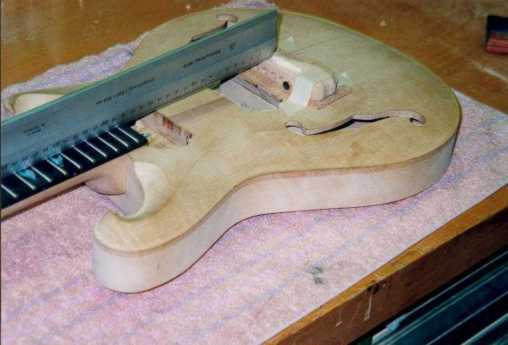
The contour is sanded with sandpaper of 80, over 120 to 240 grain. Since the uneven growth in curly maple likes to tear out small pieces of wood, you have to pay attention to the direction of growth when planing and carving. It is better to sand once more than to carve a mark.
 |
 |
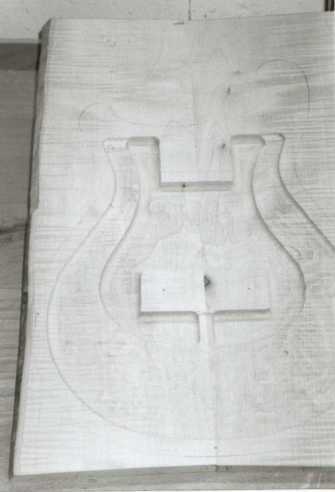
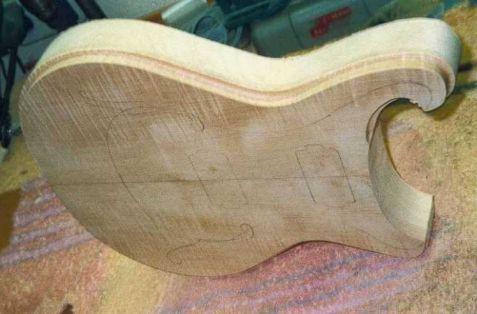
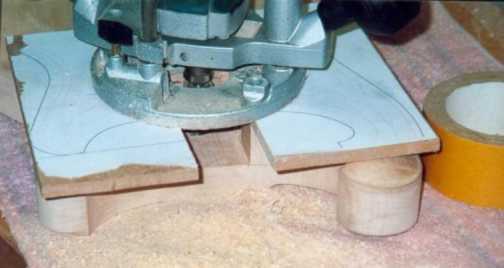
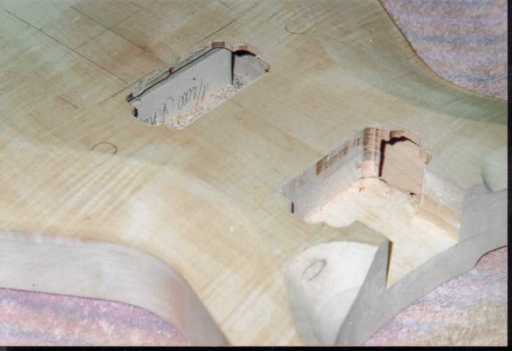
For the milling of the pickups and the neck attachment they are pre-drilled with a Forstner bit.
 |
 |
 |
|
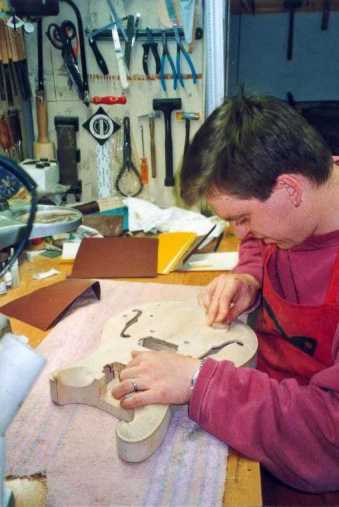
The templates hold perfectly with double-sided carpet adhesive tape.
 |
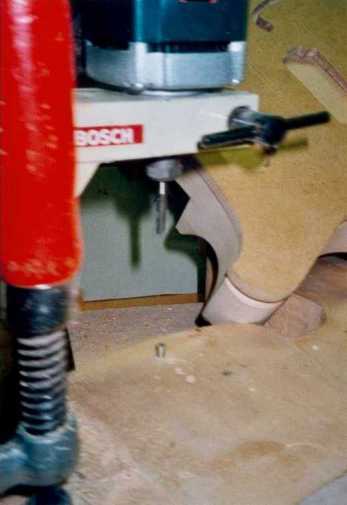 |
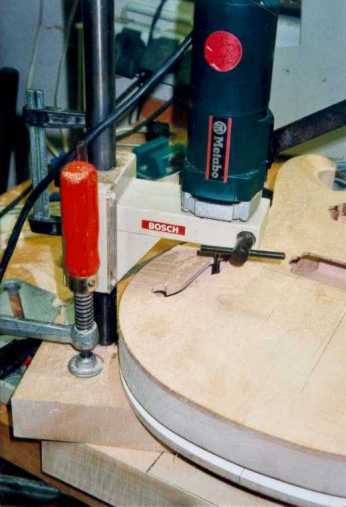
For milling the F-holes I also use a template. I glue this from the bottom side of the body. I use a 6mm milling cutter, which has a 6mm thick pin exactly opposite. This pin serves as a guide pin for the template while the milling cutter is milling through the top wood.
 |
 |
The hole for the jack socket must still be drilled.
 |
 |
Once again the neck angle is checked and the entire body is finally sanded with 240 grain sandpaper.

|
Rall Guitars & Tools Hauptstrasse Tel +49 (0) 8803-48856-56 Retail Shop: By appointment only
|
Subscribe our Newsletter By subscribing our newsletter you accept our Privacy Policy and Terms and Conditions. |