Tools, parts and what you need for guitarmaking

-
Tools & Jigs
-
Tools
- Fretting Tools (Base)
- Pliers
- Sanding Blocks
- Brushes
- Files
- Routers
- Routing Templates
- Templates / Straight Edges
- Fretting Templates - Fret Scale Templates
- Clamps
- Knives
- Measuring Tools
- Tool Sets
- Reamer
- Keys, Wrenches
- Drill Jigs
- Saws
- Drill Bits
- Scrapers
- Bending Irons
- Other Tools
- Fret Hammer
- Fret Pressing
- Fretboard Protector
- Fret Bender & Tang Nipper
- ... More
- Jigs for Luthiers
-
Tools
-
Hardware & Parts
- Necks & Bodies
- Tuners
-
Hardware / Parts
- Truss Rods
- Carbon / Titan Reinforcement
- Trussrod Nuts
- Washer for truss rods
- Bridge Pins
- End Pins
- Bridges & Tailpieces E-Guitar
- Bridges & Tailpieces
- Covers
- Pickguards / Scratch Plates
- Strap Locks
- Bridge Accessories / Spare Parts
- Screws, Nuts, Washers
- Neck Attachement
- String-Ferrules
- Jack plates
- Control Plates
- String Retainer / String Trees
- knobs (pots/switch)
- Relic Parts
- ... More
- Nuts & Saddles
- Fret Wire
- Pickups & Electronics
- Materials & Supplies
- How-to
- Guitar Making
Shop Startpage Guitar Making Repairs Steelstring Repairs Steelstring Re-Fret
Steelstring Re-Fret of Martin Western guitar
Here I show the re-fretting of an older Martin acoustic guitar.
This one is a challenging repair - looks easy, but it can miss and that would be a shame.
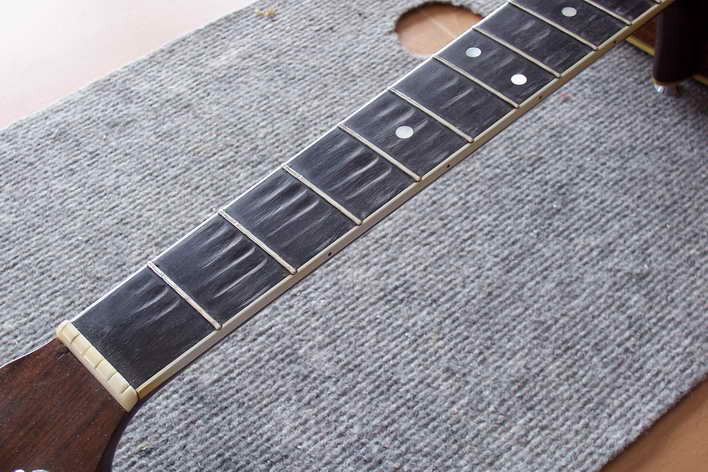
As you can clearly see, it's no longer enough to just dress up the frets here. The fingerboard itself is also heavily worn - although this really does not harm the sound. Up to the 12th fret there are strong playing marks, all others are still good. I therefore decide to change only the really defective 12. Some advise against only partially fretting - but I didn't understand the arguments.
I use the fret wire of the same size and after dressing everything must be at the same height.
 |
 |
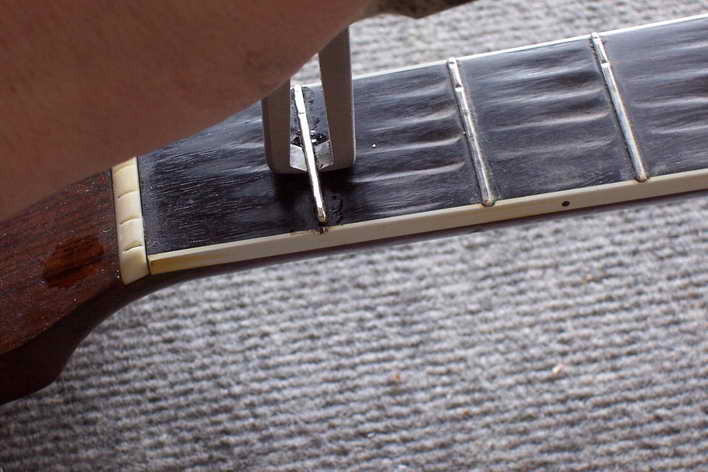
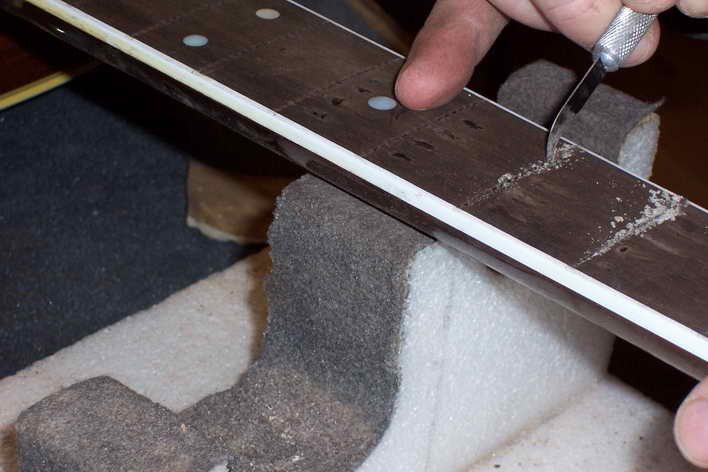
With a hot soldering iron I would be the frets before. Partially, they are already glued in and in my experience, the bars come out better when heated briefly and the tearing of the wood is also reduced. With my fret puller you carefully reach between the fret wire and the fretboard wood and the wedge effect lifts the fret wire upwards. If you work in this way along the entire fret bar, you have it out immediately.
 |
 |
 |
|
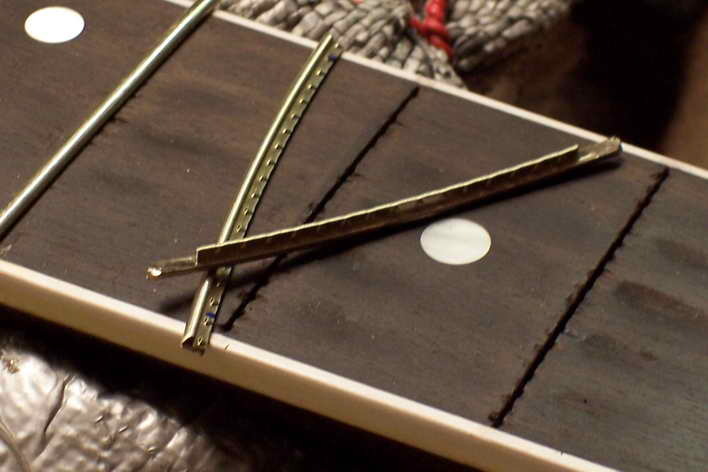
For fretboards with binding, the fret wire is gutted slightly inward. For this I sell special pliers. Of course, this is also a lot more complicated with the file.
 |
 |
 |
 |
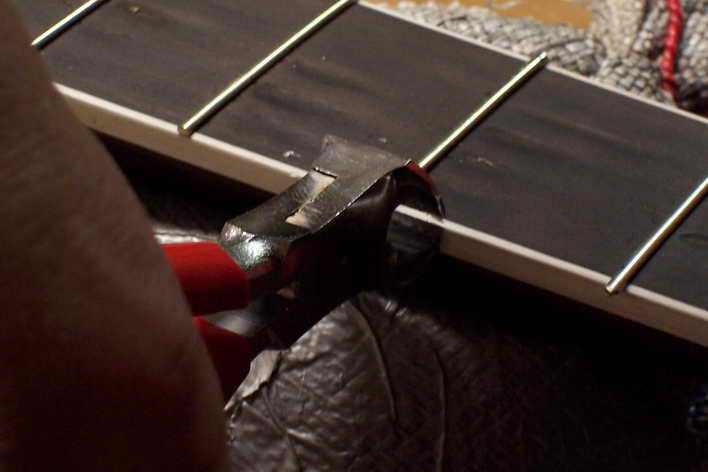
The frets are tapped in, pinched off at the sides and then filed with the fret end files first at 90° and then at 35° to the fingerboard plane.
 |
|
 |
 |
The frets are knocking, nipped off the side and then with the band end files first filed with 90 ° and 35 ° with the fingerboard level.
 |
|
 |
 |
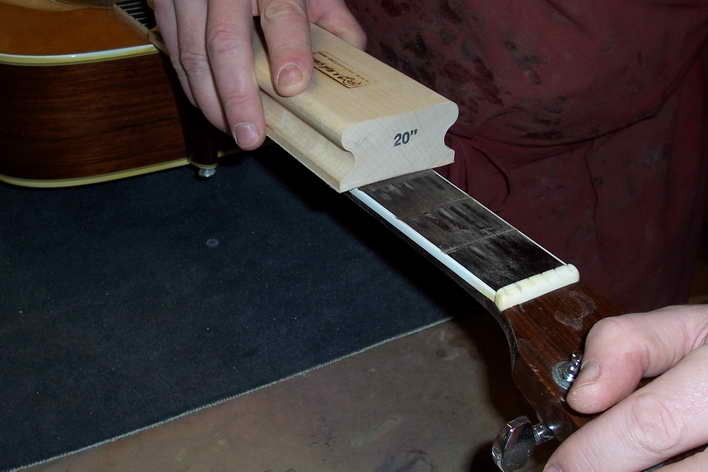
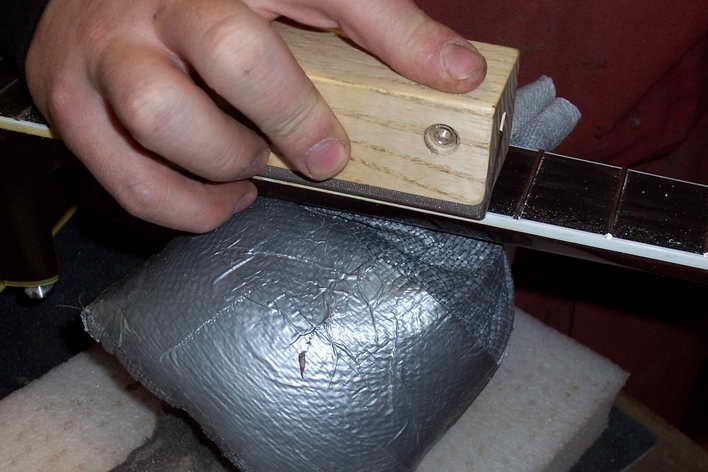
The struck-in frets must be exactly at the same height. For this purpose, they are dressed. In addition to the solid dressing files, there are also some with an attached handpiece. Here I show the dressing with the sanding block.
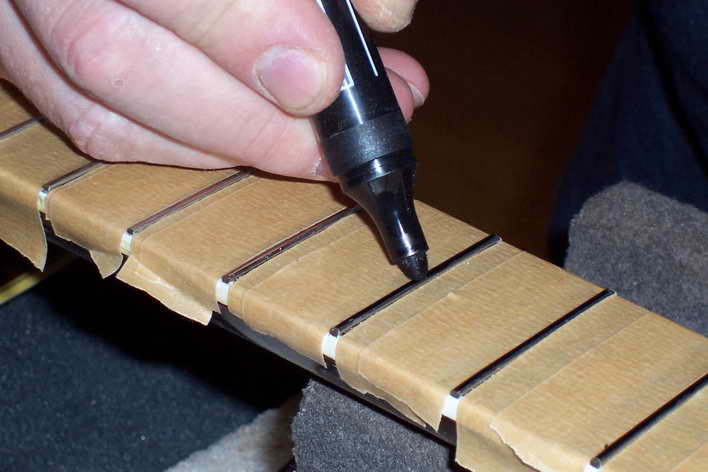
To do this, first tape off the fingerboard and mark the fret areas with a dark, permanent fiber pen. Apply 320-grit abrasive cloth to the sanding block with double-sided tape. Now grind the collar surface with light pressure. The marking with the fiber pen indicates when enough sanding is done. Pay close attention to the mark. As soon as it is ground, it means that the frets in the neighborhood are at the same height and you stop the dressing.
 |
 |
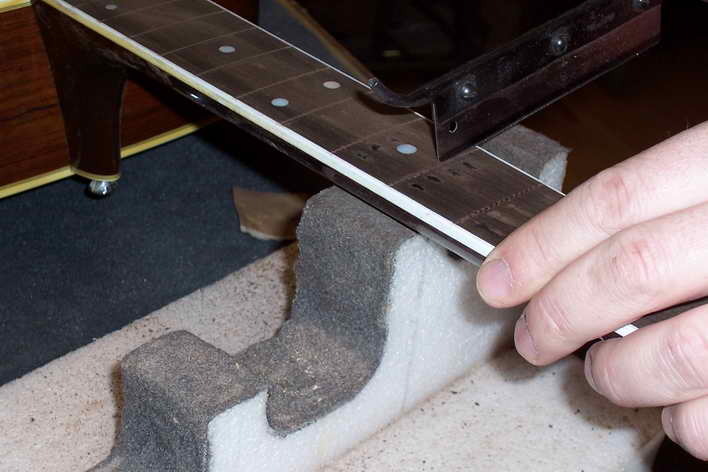
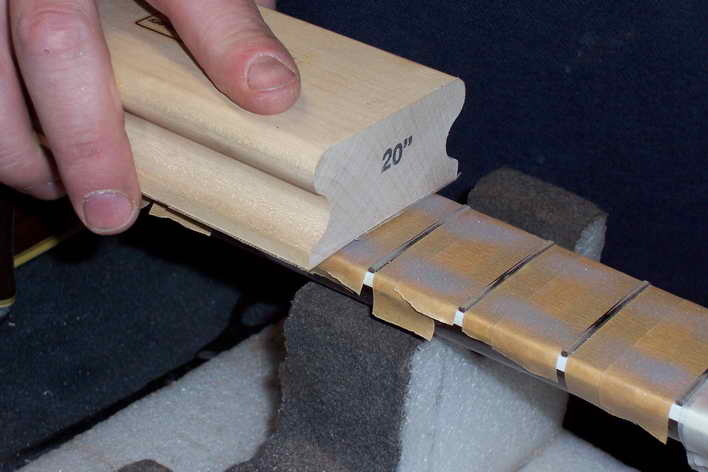
Use rulers of different lengths to check the dressing result. An uneven light gap or a tilt on the high fret indicates that something still needs to be dressed. If it fits, the frets are marked again and the fret head is rounded again with the fret file. On some, even well-known, factory guitars, this step is omitted - only you notice it when playing.
If you work with the fret file, you have to watch the mark again. You have filed deep enough when a narrow strip of mark remains on the tip of the head. Now the polishing of the frets begins.
 |
|
 |
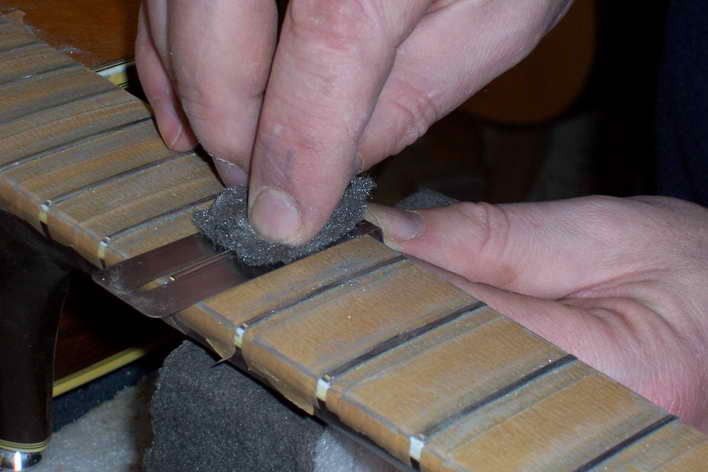 |
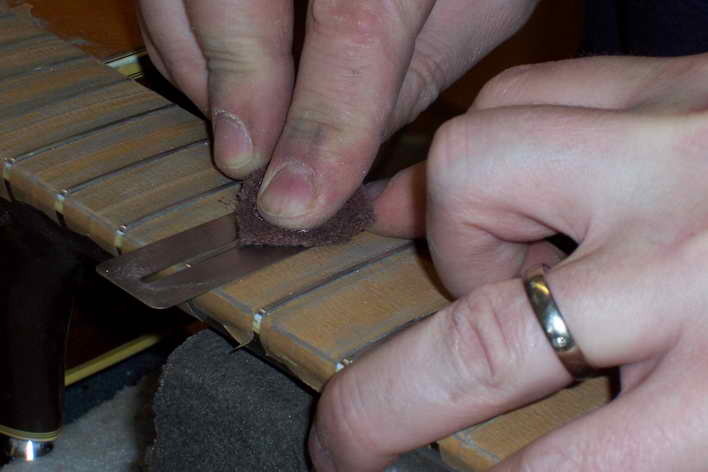
I polish the frets to a high gloss in three stages: first 320 abrasive cloth, then abrasive fleece and finally 0000 steel wool. A fingerboard protector prevents sanding through.
 |
 |
Now you can remove the tape and rub some fretboard oil on the fretboard with a small cloth.
Put the strings back on, check if there is any buzzing and you are ready to go again.

|
Rall Guitars & Tools Hauptstrasse Tel +49 (0) 8803-48856-56 Retail Shop: By appointment only
|
Subscribe our Newsletter By subscribing our newsletter you accept our Privacy Policy and Terms and Conditions. |