Tools, parts and what you need for guitarmaking

-
Tools & Jigs
-
Tools
- Fretting Tools (Base)
- Pliers
- Sanding Blocks
- Brushes
- Files
- Routers
- Routing Templates
- Templates / Straight Edges
- Fretting Templates - Fret Scale Templates
- Clamps
- Knives
- Measuring Tools
- Tool Sets
- Reamer
- Keys, Wrenches
- Drill Jigs
- Saws
- Drill Bits
- Scrapers
- Bending Irons
- Other Tools
- Fret Hammer
- Fret Pressing
- Fretboard Protector
- Fret Bender & Tang Nipper
- ... More
- Jigs for Luthiers
-
Tools
-
Hardware & Parts
- Necks & Bodies
- Tuners
-
Hardware / Parts
- Truss Rods
- Carbon / Titan Reinforcement
- Trussrod Nuts
- Washer for truss rods
- Bridge Pins
- End Pins
- Bridges & Tailpieces E-Guitar
- Bridges & Tailpieces
- Covers
- Pickguards / Scratch Plates
- Strap Locks
- Bridge Accessories / Spare Parts
- Screws, Nuts, Washers
- Neck Attachement
- String-Ferrules
- Jack plates
- Control Plates
- String Retainer / String Trees
- knobs (pots/switch)
- Relic Parts
- ... More
- Nuts & Saddles
- Fret Wire
- Pickups & Electronics
- Materials & Supplies
- How-to
- Guitar Making
Shop Startpage Guitar Making Repairs Steelstring Repairs Steelsting bridge repair
Steelsting Bridge Repair
Here I show the repair of a detached bridge on an acoustic guitar
The most heavily loaded glued joint is the bridge mounting. Depending on the scale length, number of strings and thickness, this can add up to 65-85 kg for a 6-string guitar. These connections must be made in the best possible way, i.e. two parallel gluing surfaces must fit snugly together, the surface must have the best possible properties (roughness, freedom from grease), the materials must be optimally paired, and the glues must be optimally applied.
So - everything ideal?
Since this is of course not always the case, bridges of acoustic guitars often come loose. The causes are often weather-related (drought! Humidity! Heat!) but often also material failure and non-optimal manufacturing. If the glue joint fails abruptly (especially due to weather conditions), it makes a bang and the bridge stands out. If this collapses over time, the web opens at the back, deforms and then tears off. If a ceiling strip loosens on the inside, first the ceiling bulges and then the web loosens. In addition, there is often damage to the reinforcing wood piece on the inside of the ceiling. So the damage patterns may result in more repair work than one might expect at first glance. The following description, repairs a simple re-gluing of damage caused by weathering. No interior moldings have come loose, the ceiling has bowed somewhat, and gluing must be done with hide glue.
 |
 |
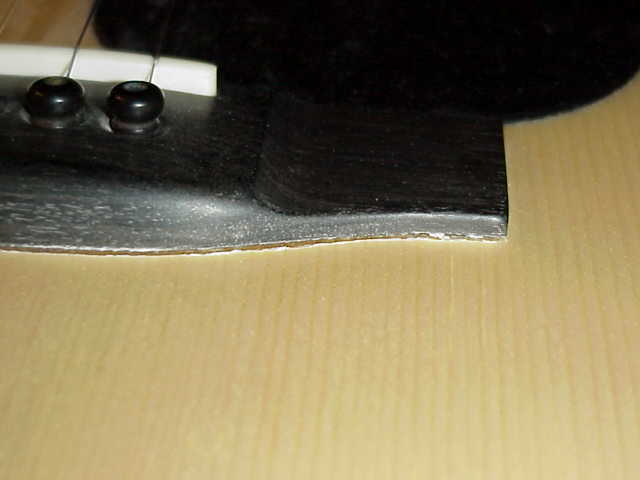
The first steps are to detach the whole bar. Sometimes you have to mark the old position in order to do this correctly again when reinserting. Also, this is the opportunity to check once the correct position at all, some are not correct by a few millimeters. This is correct if the center of the bridge insert is 3.8mm behind the scale length and the compensation is about 6mm/150mm (low string further away, valid for 25" to 25.75").
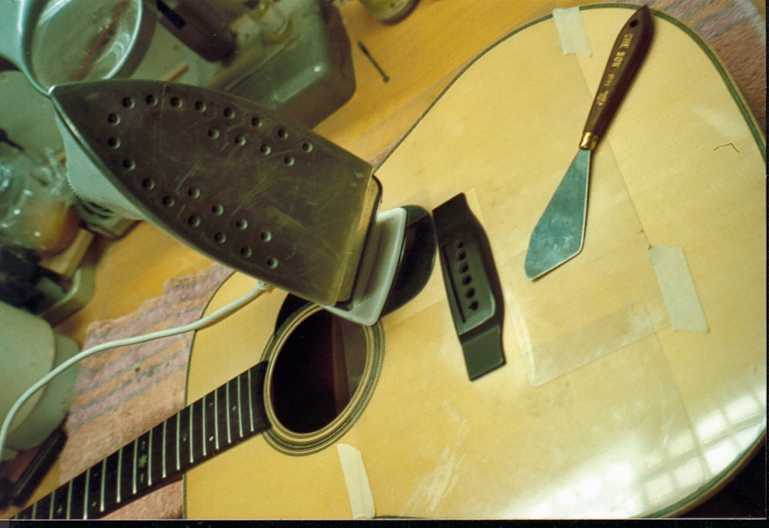
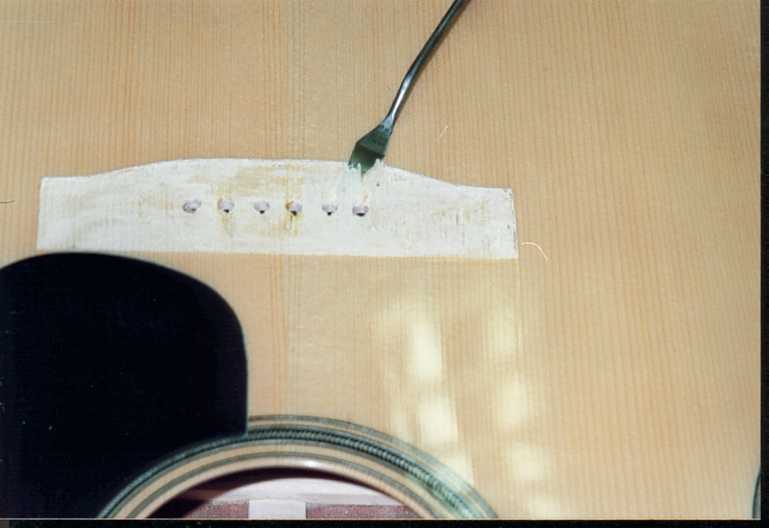
Carefully heat the bar with an iron and slowly work your way from the corners with a Japanese spatula. The spatula is wetted with water to dissolve the glue. Since the bridges are curved and you have to move the iron back and forth, it is advisable to protect the guitar top. This can be done with heat resistant materials but also with a little more care with a cardboard box. When applying the heat, it is important that this happens moderately but firmly. If after 10 minutes you still have not brought a spatula into the glue joint, the iron is probably a little too cold ;-). When preparing the filler, please also pay attention to whether you are still following the glue line or are already in wood fibers.
 |
 |
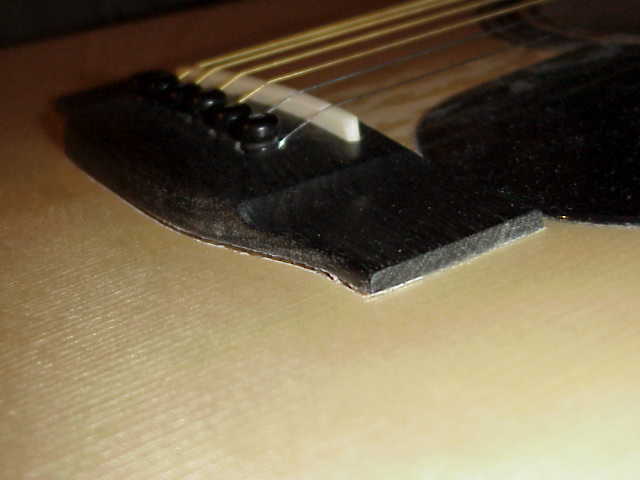
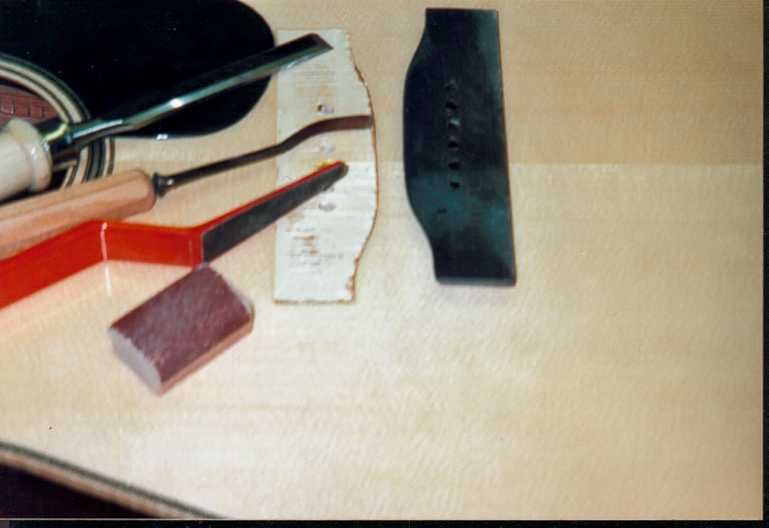
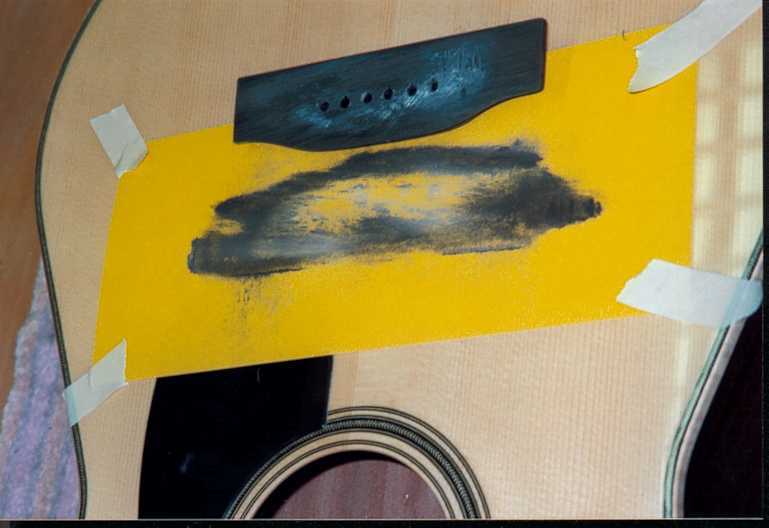
Once the bridge is off, it is best to remove the glue residue from both the top and the underside of the bridge while it is still warm. Sandpaper on a small wooden block, Sandvik's special files and chisels are suitable for this purpose. If you can see protruding wood fibers after lifting, it is best to fix them with glue first. The glue spot must be even and without imperfections. It is also perfectly permissible to fill larger spalls with pieces of wood or veneer.
 |
 |
So that the bar is parallel to the ceiling, it must be adjusted slightly. To do this, attach sandpaper to the ceiling, color the underside of the bar with chalk and sand the bar back and forth on the later gluing point. If no more chalk marks are visible, check the surfaces without sandpaper and you will usually get an optimum result.
 |
 |
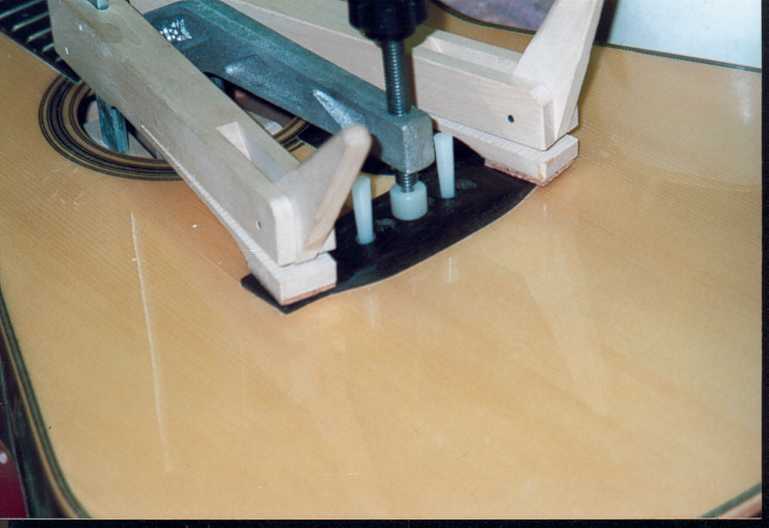
Now that the gluing surfaces are optimally prepared, you need three clamps that are long enough to reach the bar through the sound hole and narrow enough to fit in the sound hole all at once. On the underside, you need a shim that bridges the X-bars. This can be made by pressing a piece of styrofoam on the spot and drawing the impression on a piece of wood. Since usually only the space under the X-beams is provided with a reinforcing board, the outside corners of the shim must be lined with pieces of wood of the same height (approx. 3mm). You can apply double-sided tape to these corners before inserting the hatchet and fix them in the carcase before gluing (trick!). Another difficulty is moving the bridge under forcing pressure on the slippery glue. To prevent this, there are small, cone-shaped plastic plugs, which, provided with the same cone of the string pins, inserted into two old string holes, protect the bridge against shifting during gluing.
 |
 |
After making a dry run for clamping, the glue must be brought to temperature. Apply glue, fix the bridge with pins, apply clamps, check position, remove excess glue and let the whole thing dry overnight. Before inserting the bone inlay and stringing, clean and polish the guitar body and you're done!

|
Rall Guitars & Tools Hauptstrasse Tel +49 (0) 8803-48856-56 Retail Shop: By appointment only
|
Subscribe our Newsletter By subscribing our newsletter you accept our Privacy Policy and Terms and Conditions. |