Tools, parts and what you need for guitarmaking

-
Tools & Jigs
-
Tools
- Fretting Tools (Base)
- Pliers
- Sanding Blocks
- Brushes
- Files
- Routers
- Routing Templates
- Templates / Straight Edges
- Fretting Templates - Fret Scale Templates
- Clamps
- Knives
- Measuring Tools
- Tool Sets
- Reamer
- Keys, Wrenches
- Drill Jigs
- Saws
- Drill Bits
- Scrapers
- Bending Irons
- Other Tools
- Fret Hammer
- Fret Pressing
- Fretboard Protector
- Fret Bender & Tang Nipper
- ... More
- Jigs for Luthiers
-
Tools
-
Hardware & Parts
- Necks & Bodies
- Tuners
-
Hardware / Parts
- Truss Rods
- Carbon / Titan Reinforcement
- Trussrod Nuts
- Washer for truss rods
- Bridge Pins
- End Pins
- Bridges & Tailpieces E-Guitar
- Bridges & Tailpieces
- Covers
- Pickguards / Scratch Plates
- Strap Locks
- Bridge Accessories / Spare Parts
- Screws, Nuts, Washers
- Neck Attachement
- String-Ferrules
- Jack plates
- Control Plates
- String Retainer / String Trees
- knobs (pots/switch)
- Relic Parts
- ... More
- Nuts & Saddles
- Fret Wire
- Pickups & Electronics
- Materials & Supplies
- How-to
- Guitar Making
Shop Startpage Guitar Making Techniques Shielding
Shielding of electric compartment
Who hasn't experienced this: You're playing a beautiful number, maybe the recording recorder is also running - and something is humming. As soon as the guitarist or the bassist turns a little, the humming becomes less.
The cause for this is almost always the so-called mains hum with approx. 50Hz. Here the pickup (actually only magnetic single coil types) reacts as an antenna and receives e.g. the EMC pollution of your guitar transformer or e.g. the neon tube on the ceiling.
Minimizing the "radiation dirt" in the air is often more difficult than professional shielding in the guitar itself.
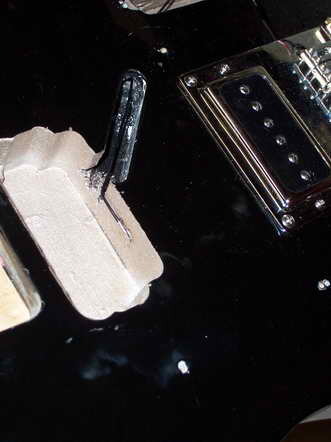
Here I show how I shielded the millwork on a Telecaster conversion to Duisenberg P90 pickups.
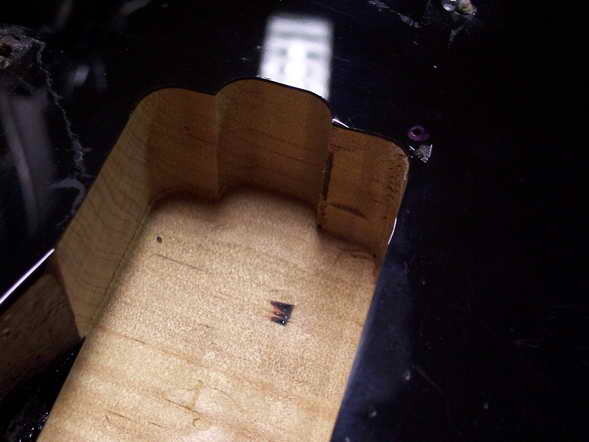
There are several shielding possibilities. Actually, it is always a matter of building a metallic conductive sheath, which is to be connected to the ground line.
I name two variants:
Sticking with metallic conductive foil
- Copper foil
spray or better brush with metallic conductive paint
- Copper conductive paint
- Graphite color
- Silver conductive lacquer
- EMC Shielding (eg copper-based)
Surely this also works with aluminum foil - but then don't bring the guitar to me (except for remaking :-))!
Alufoil can be connected quite badly electrically - be it between the aluminum strips as well as to the ground of the guitar.
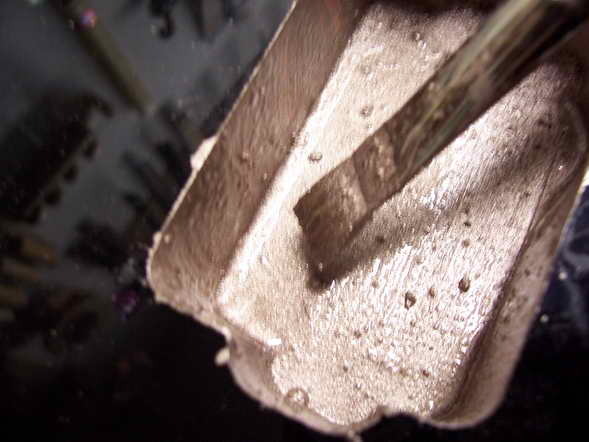
I use a water-based copper conductive paint - environmentally friendly, fast drying and super-tight. Here the manufacturer promises a shielding effect of over 60 dB (99.9999%).
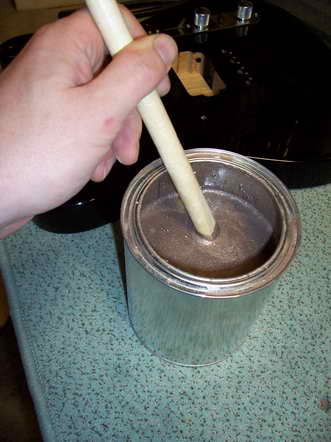
It is very important that the conductive particles are evenly distributed in the paint. To do this, stir well with the plastic whisk (5-10 minutes !).
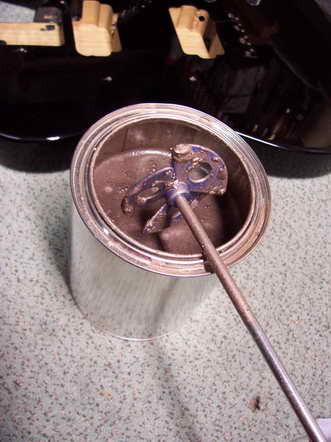
And stir!
Important: the shielding only works properly when the entire conductive jacket is connected to ground! This is done by sticking a piece of one-sided adhesive copper tape under the shielding paint as a soldering base. If one brushes the shielding paint over the tape, the connection is created between the tape and the paint.
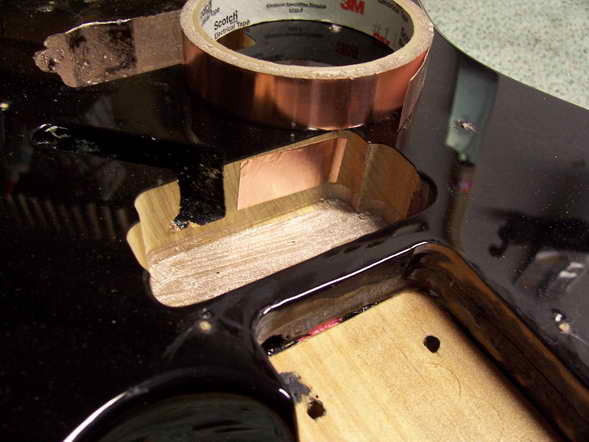
Painting the surfaces according to the manufacturer's instructions (here 2-3x)
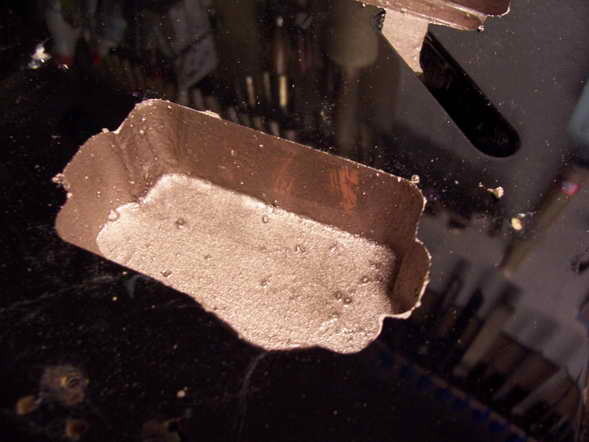
A piece of cable is soldered onto the copper strip and then connected to a potige housing, e.g. in the electrical compartment. With the ohmmeter you can still measure the shield resistance. In the distance of approx. 6 cm to the shielding surface held the measuring instrument must indicate less than 1.5Ohm. Perfect!

|
Rall Guitars & Tools Hauptstrasse Tel +49 (0) 8803-48856-56 Retail Shop: By appointment only
|
Subscribe our Newsletter By subscribing our newsletter you accept our Privacy Policy and Terms and Conditions. |