
Shop Startpage Guitar Making Tools Fox Bender
Fox Bender
Here I show the making of the so-called "Foxbender", a device for bending solid guitar sides.
Anyone who has ever built an acoustic guitar knows that bending sides is not exactly one of the easiest operations. Normally, the guitar maker bends the frame freehand over a bending iron. The wood, which is about 2.5 mm thick, is soaked in water for about 5 minutes and bent on the hot bending iron. In order to produce the outer contour accurately, the frame is repeatedly held against a template. The advantage of this procedure is the low effort needed to start: a bending iron and a template made of pressboard.
The disadvantage, however, is the low accuracy and the great skill required in handling the bending iron. Any unevenness in the wood structure, such as occurs every few millimeters in a curly maple, is a potential breaking point if the bending pressure, speed or temperature is not right. The bending of the frames can easily take 60 minutes per frame. Of course, it is also a satisfying job when you look at the finished frames - but the thrill whether firewood or not!
In a simple way, you can help yourself with a device here. The guitar maker and repairer Charles Fox, who comes from the USA, has set a standard with his "Universal Wood-Bending Machine", which is used in small series in the workshop as well as by companies such as Martin Guitars in special series. The principle is simple: one half of the guitar body is made as a hollow form. A type of press holds this hollow form. Inside the hollow form, three light bulbs a' 200Watts apply enough heat to plastically deform the wood of the frame as if on a hand bending iron. The wood of the frame is placed between two 0.5mm thick stainless steel sheets to protect against breakage. The sheets distribute the heat and the force of the press. I call the device a press because a shoe, which fits exactly into the waist, applies force to the stainless steel sheet/frame wood sandwich via a trapezoidal threaded spindle, thus pressing it against the hollow form. The sandwich can be attached to the press at both ends.
Using a timer, one starts the bending process (actually baking process) with the lamps and after a good 15 minutes of baking, a frame is ready. One waits still until the device is completely cooled down and ready is the frame.
An exact description and the current prices (in the English catalog) of the bending machine and the following products can be found at Luthiers Mercantile International:
| designation | description | Price in US $ |
| PL13 | Plan of the Universal Fox Benders | 13,00 |
| SPBU | Complete kit for the preparation, incl. Lamp socket, screws, springs, etc. | 425.00 |
| SPBUM | Kit for self without wooden parts and timer | 195.00 |
| SPBUP | Kit for self only wooden parts | 145.00 |
| SPBUCUT | Additional for bending Cutaways | 418.00 |
So I bought the plan and in the following I will show how to make it in a few steps. The whole building process can be divided into the following steps:
Make right and left side part of the press
Making the feet of the bender
Assembling the outer parts and wiring the electrics
Making the hollow form
The trapezoidal thread spindle
Making the bottom block (shoe)
Inserting the bottom block (shoe)
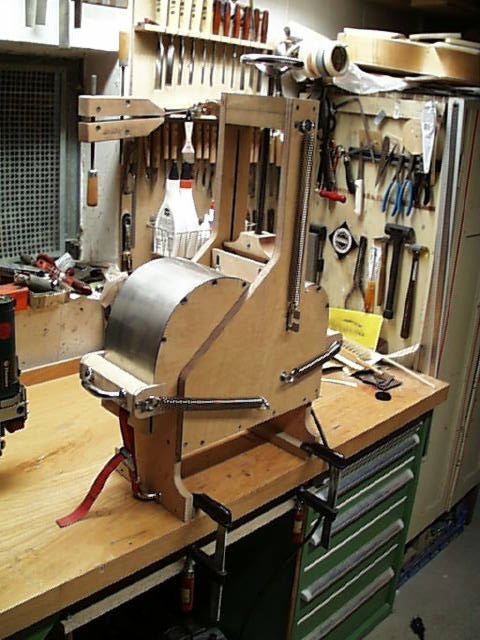
The finished foxbender
Tips
Before starting, of course, all the material has to be prepared. For me the material list looked like this:
| designation | Quantity | Dimensions | material |
| Side panel Press | 2x | 600x400x19 | plywood |
| Feet Press | 2x | 250x230x19 | plywood |
| Block above (parent) | 1x | 155x75x60 | Hardwood |
| Block bottom (shoe) | 1x | 155x60x60 | Hardwood |
| Shoe moldings | 7-10 Pieces | 155x50x8 | plywood |
| Shoe (performs "Klotz bottom" in the guide slot) | 1x | 190x80x8 | plywood |
| Clamping shoes (sandwich presses to mold) | 2x | Ø60x158 | Hardwood |
| "Ears" for clamping shoes (lateral guidance to mold) | a '2x = 4 pieces | 70x60x8 | plywood |
| Handle large | 2x | approx 80x20 | Baumarkt |
| Handle small (fixing of the sandwich to press) | 2x | approx 80x20 | Baumarkt |
| Side panels mold | 2x | ca. 500x200x12 | plywood |
| Cross connector mold | about 10-12 pieces | 155xØ12x1 | Metal (zBAlu) pipe |
| Support plate | 2x | 850x152x0,5 (0.6) | Stainless steel (no aluminum wg. Coloring!) |
| Mount supporting plates | a '2x = 4 pieces | 152x60x1,5 | stainless steel |
| Backstop (holding sandwich with spring force from inside against the clamping shoe) | 1x | 250x40x6 | aluminum |
| Acme screw | 1x | TR16x350 | steel |
| Flange for acme screw | 1x | TR16 | Gray cast iron |
| Handwheel | 1x | > Ø120 | Alu, Kunstsoff |
| Carriage bolts | 2x | M8x120 | Galvanized steel incl. Large washers and nuts |
| Main springs | 2x | about 140xØ20xØ2 | Spring steel |
| Spring clamping shoe on the "belly" | 2x | about 120xØ20xØ2 | Spring steel |
| Spring clamping shoe at the "waist" | 2x | about 80xØ20xØ2 | Spring steel |
| Mounting brackets for springs | 10x | eg screw hooks | |
| Tension belts for end attachment of the sandwich | 2x | 25-30 wide, 350 long | DIY articles and then cut |
| Timer | 1x | 0-45 min | shortest step min. 5 minutes |
| Schuko plug | 1x | 220V | |
| Lampholders | 3x | E27 | incl. flange for screwing M10x1 |
| light bulbs | 3x | E27 / 200W | eg OSRAM "Classic" |
| cable | 1,5m | 3x1,5mm² | Flexible rubber pipe |
| Terminal box | 1x | - | Norka eg damp locations |
| Alufoil | - | - | solid kitchen quality |
| Incidentals | - | - | Screws, Pattex, box terminals, |
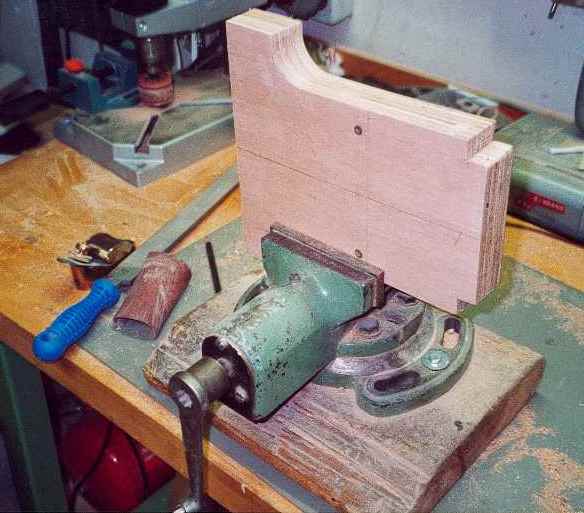
Making Right and left side of the press
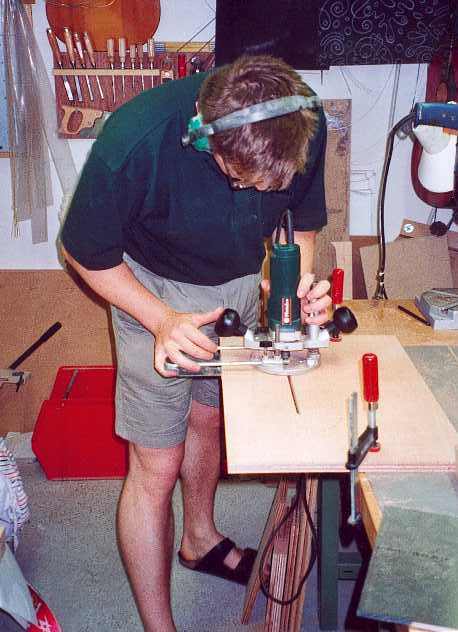
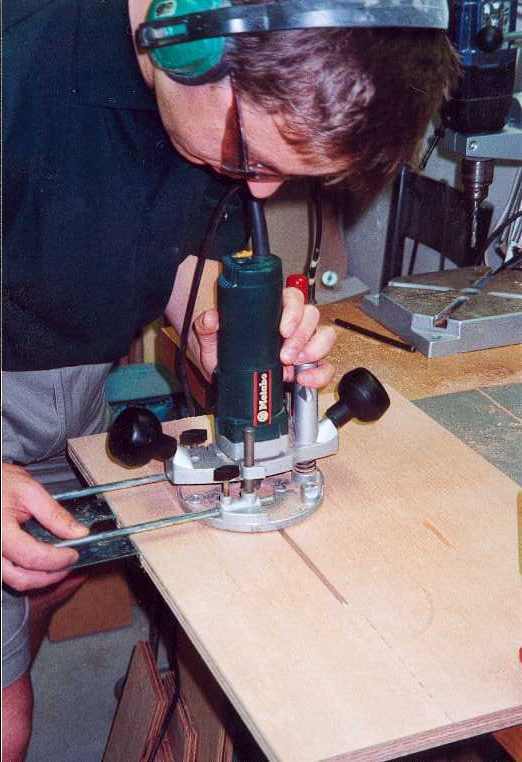
From the plan, I transferred the outer dimensions to a 19mm plywood plate. When the plate is still rectangular, the guide slot must be milled in using a router. Make sure that the slots are evenly wide and that they are cut at right angles to the bottom. Once both slots have been made, the outer contour can be sown and sanded.
 |
 |
 |
 |
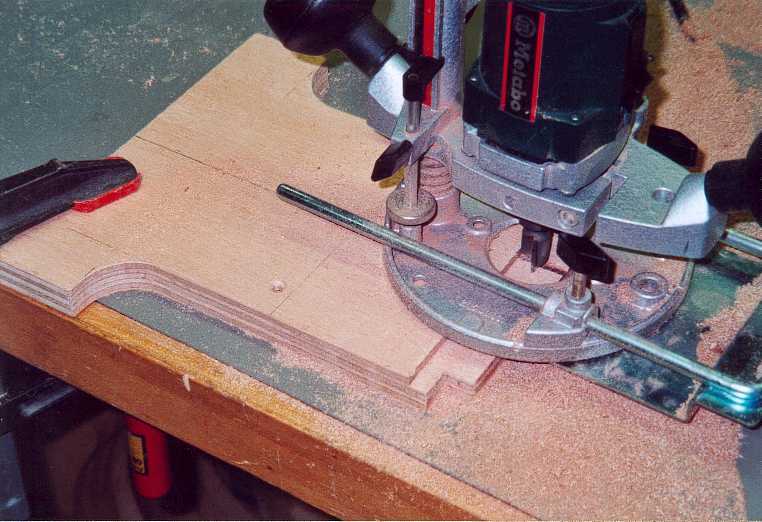
From the 250x230x19 plywood boards are made the feet. With the router, one step is worked into each for inserting the inner light deflectors
 |
 |
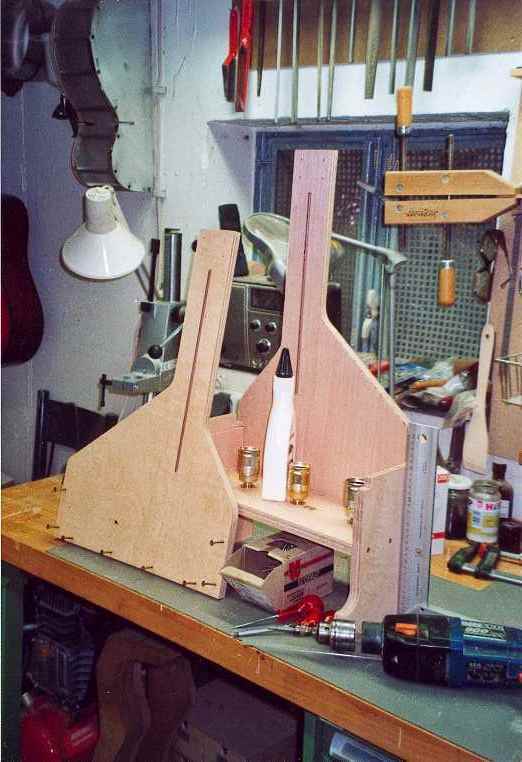
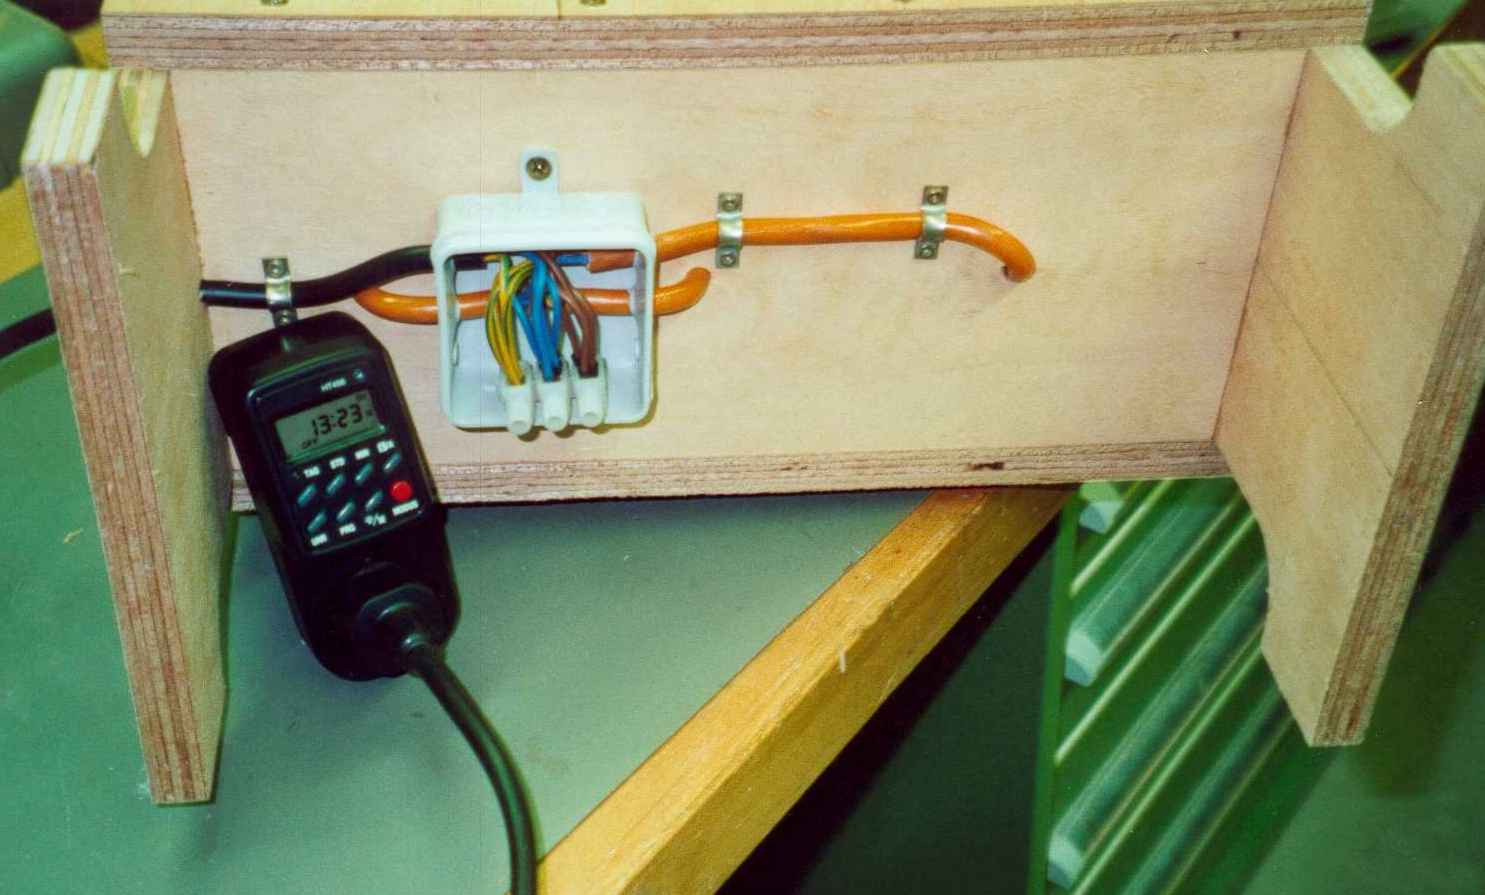
Assembling the exterior parts and wiring the electrical system
If the feet and the side parts are ready, a box is created after screwing together. Inside will fit three lamps E27 each with 200W "heating power". All the electrical equipment must be made heat-resistant. On the bottom I put a terminal box and connect the wires from the three sockets together. Now a built-in timer would be good. I bought one for intermediate installation on the supply line. It is important that you can set by the minute. I have glued the plug to the timer so that no one gets the idea to let the thing run without the automatic shutdown (fire hazard!).
 |
 |
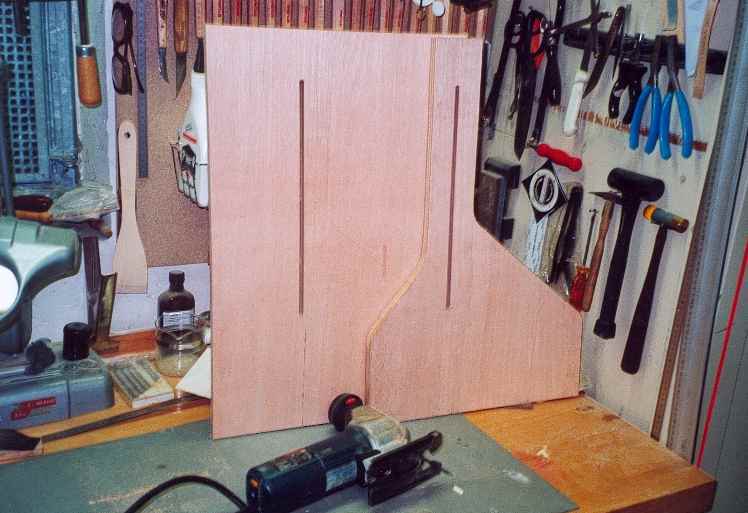
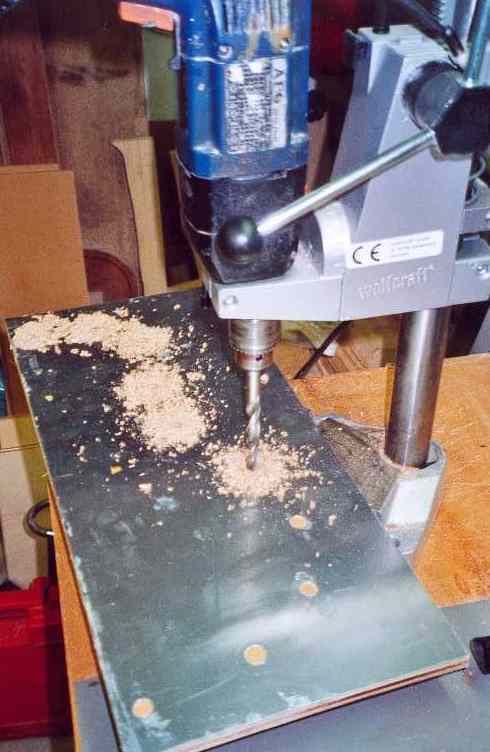
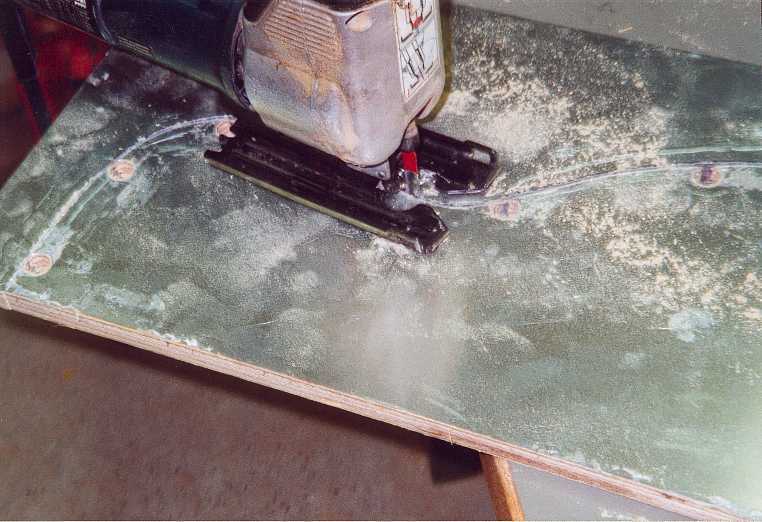
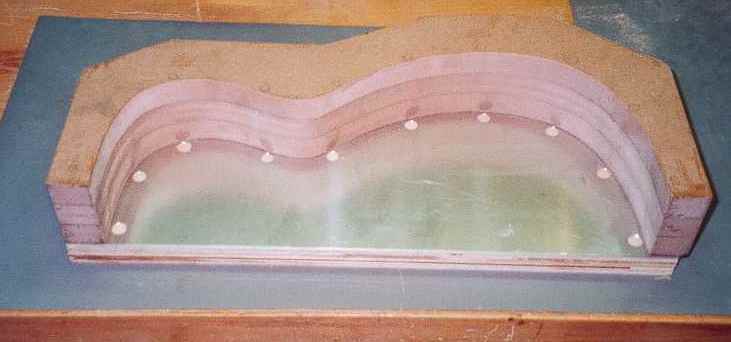
The production of the hollow mold
The hollow form determines the shape of the body. The desired guitar shape must be drawn smaller by the thickness of the rib. This hollow form is the heart of the bender and you make your own shape for each model without much effort. There is also a construction with which you can then form a cutaway.
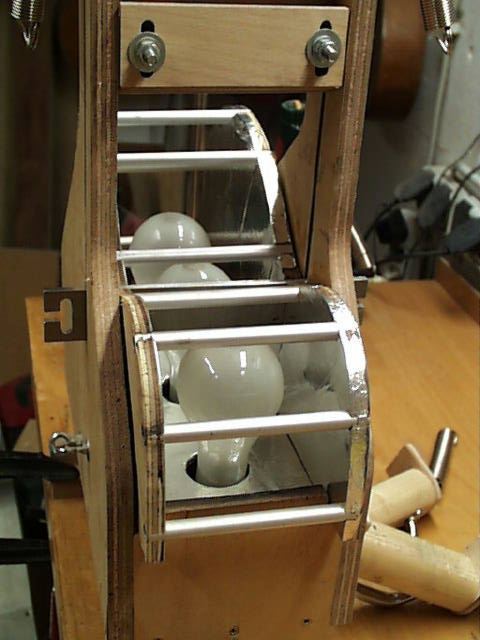
It consists of two side parts that are held to each other with tubes. For protection from the heat, the side parts (in each case the inner sides = lie down mirror-inverted!) are pasted with aluminum foil. I tried on one side to see if it is better to protect it with aluminum sheet, with the result after several uses that it holds with aluminum foil just as well and is just faster to make. As a connection I bought Ø12x1mm aluminum tubes and cut 12 rods to the length of 150mm, with a 12mm Forstner bit the tubes then fit tightly inside. The holes for the rods must be set very accurately, the frame to be bent lies on the side panels and even on the tubes. If these tubes do not tangent and protrude, for example, this goes directly into the quality of the guitar. It is then simple, if you fix the parts to be drilled on each other and drill at the same time.
 |
 |
 |
 |
 |
|
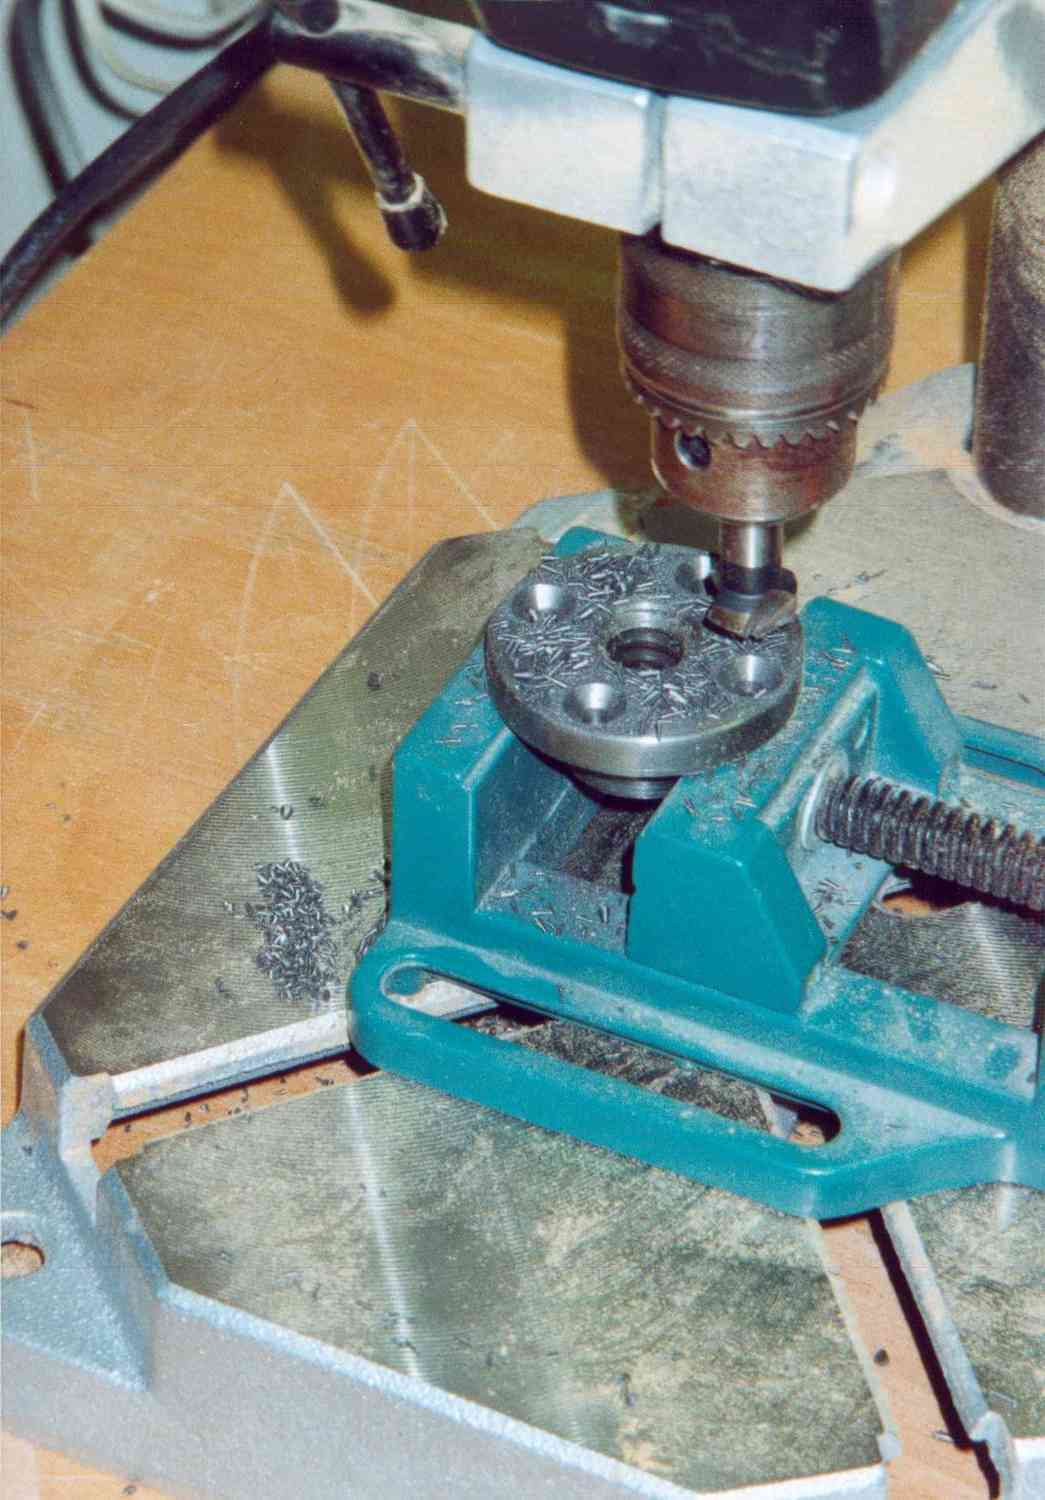
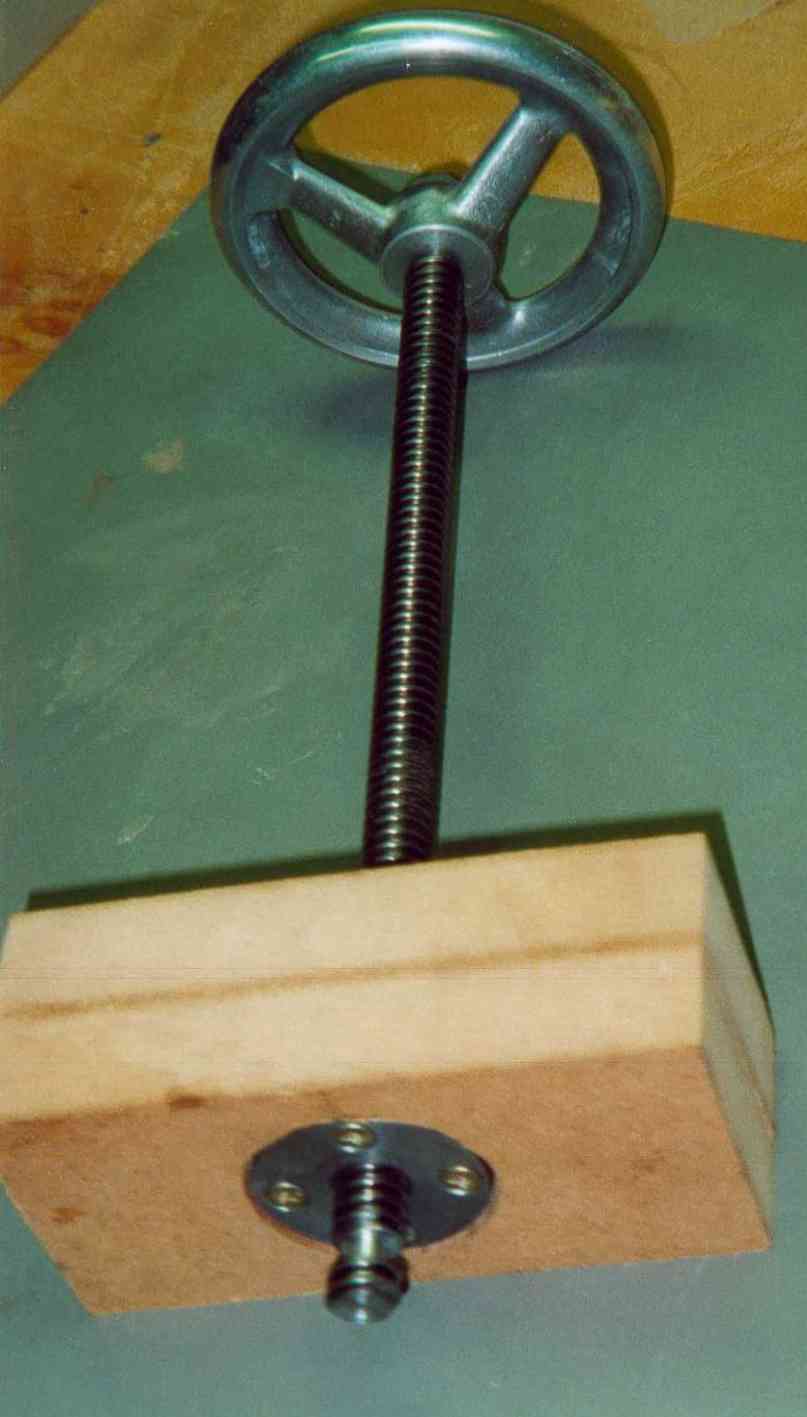
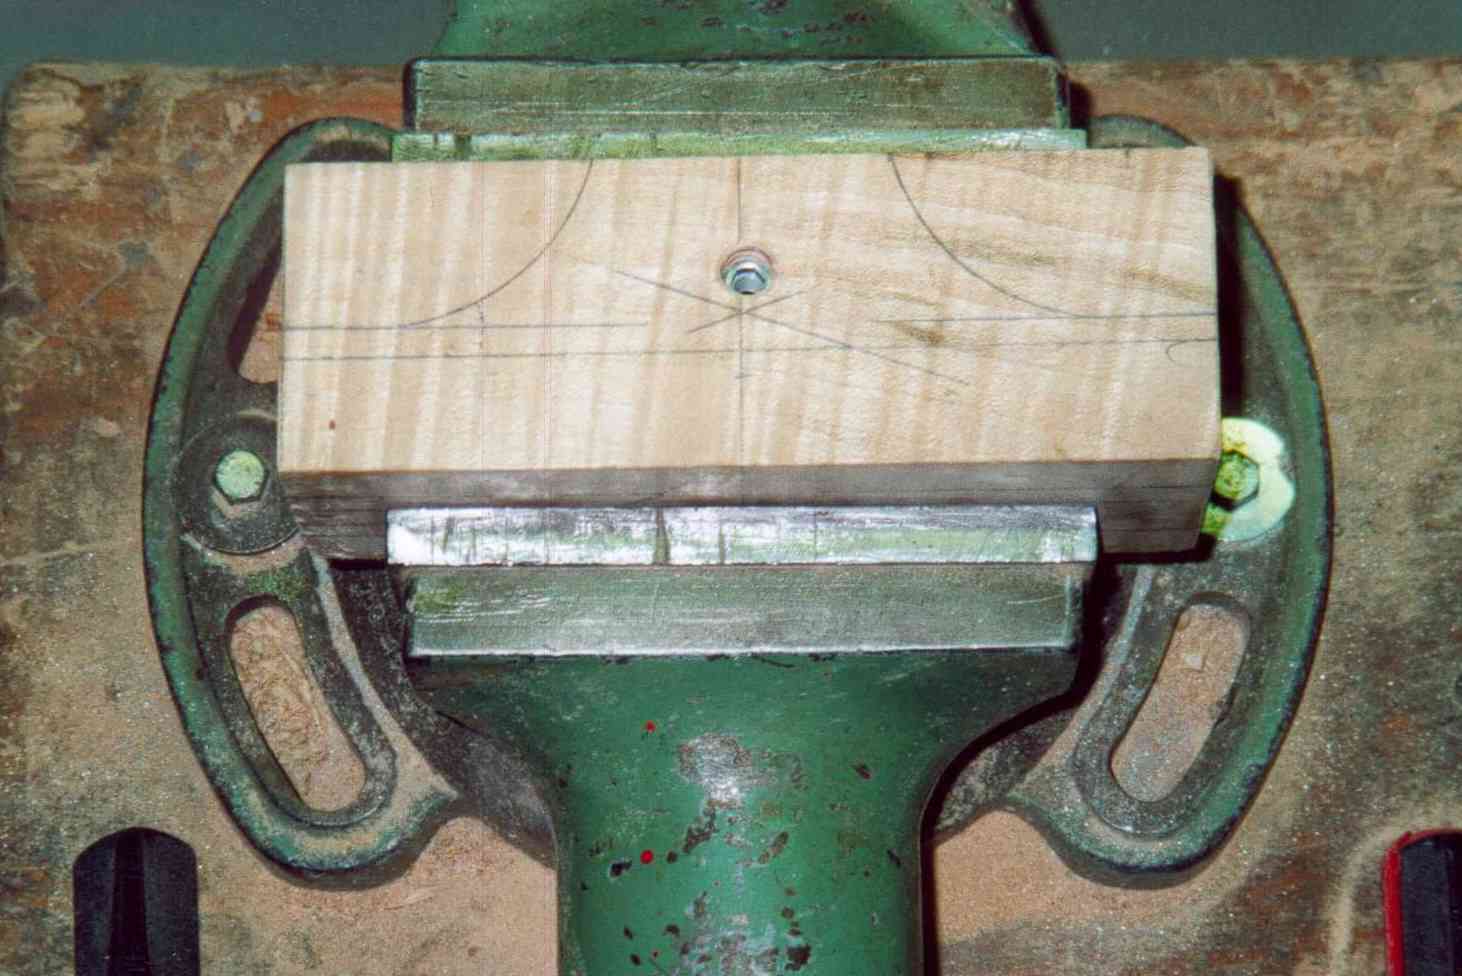
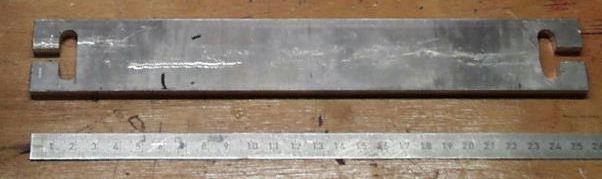
The spindle presses a form shoe onto the half form at the waist of the body. Inexpensive and relatively simple, this spindle can be made as a trapezoidal thread. They can be purchased by the meter. The end machining is done on the lathe. At one end, a handwheel must be placed (I made an M12 thread and then locked it with a nut). At the other end, a groove is cut into which a screw is inserted to which the forming shoe is attached. A wooden block holds the spindle nut. It is best to buy a flange nut, depending on the version, you still have to drill the holes yourself. So machine the nut, fit the wooden block to the nut and fix it in the box.
 |
 |
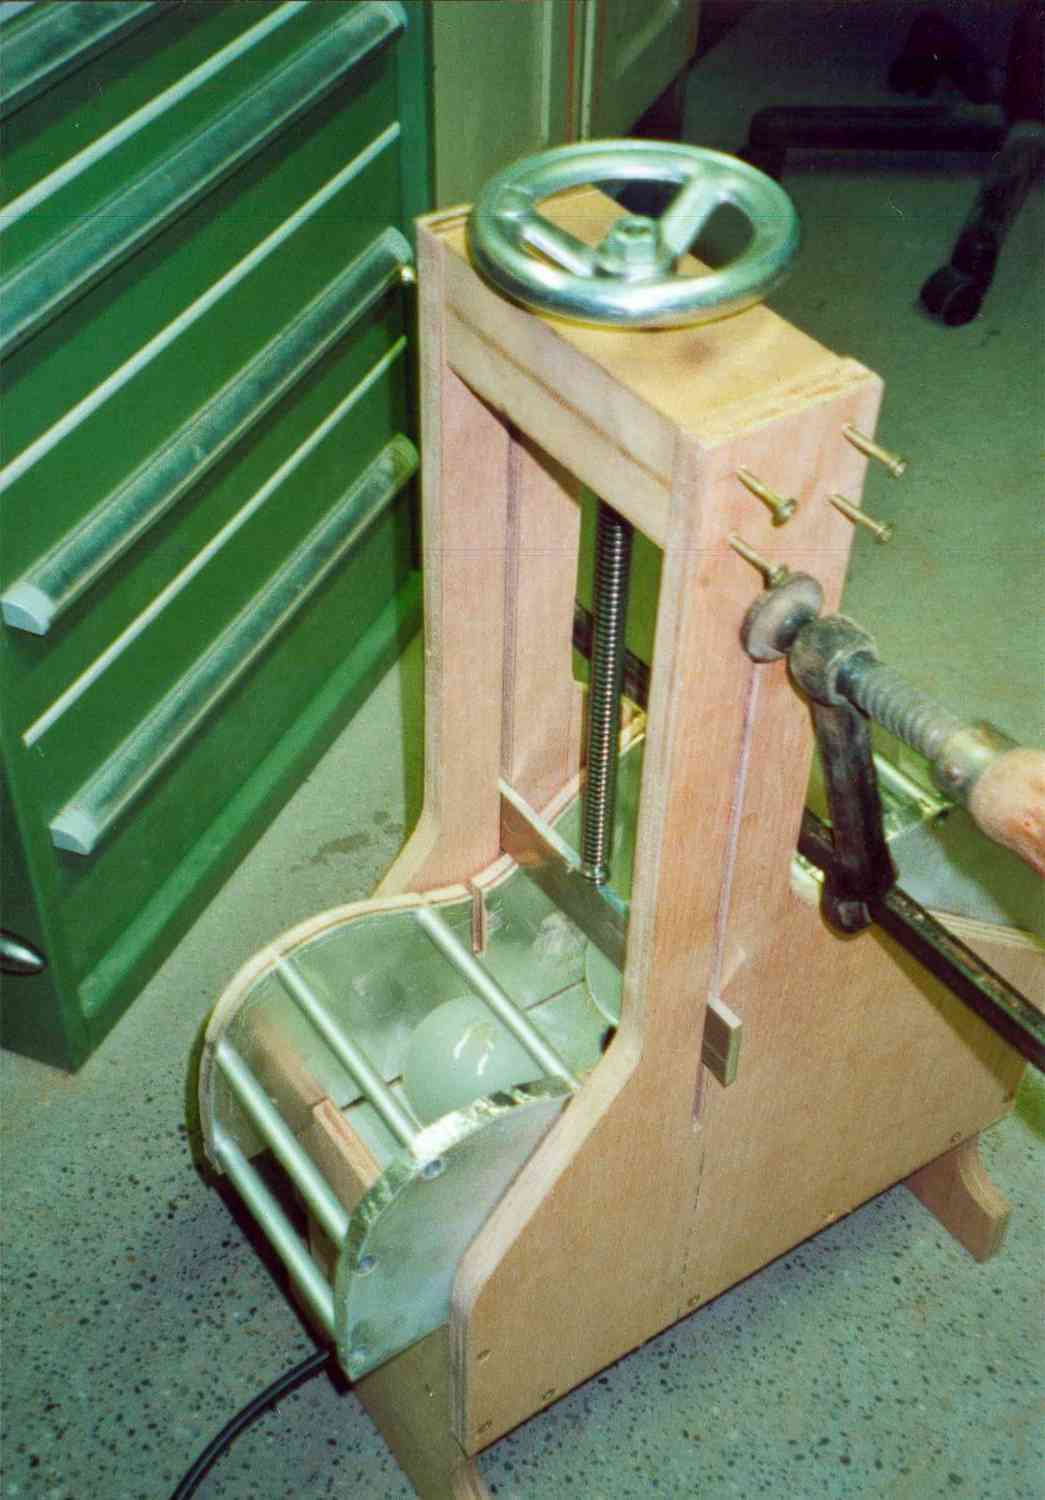 |
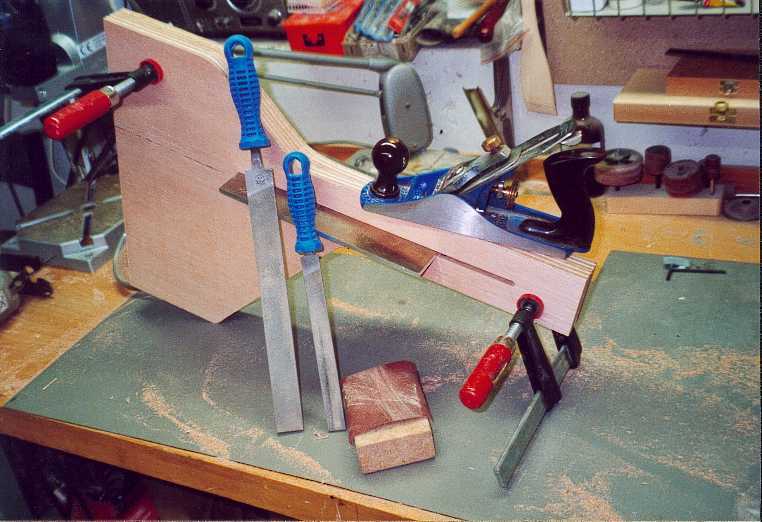
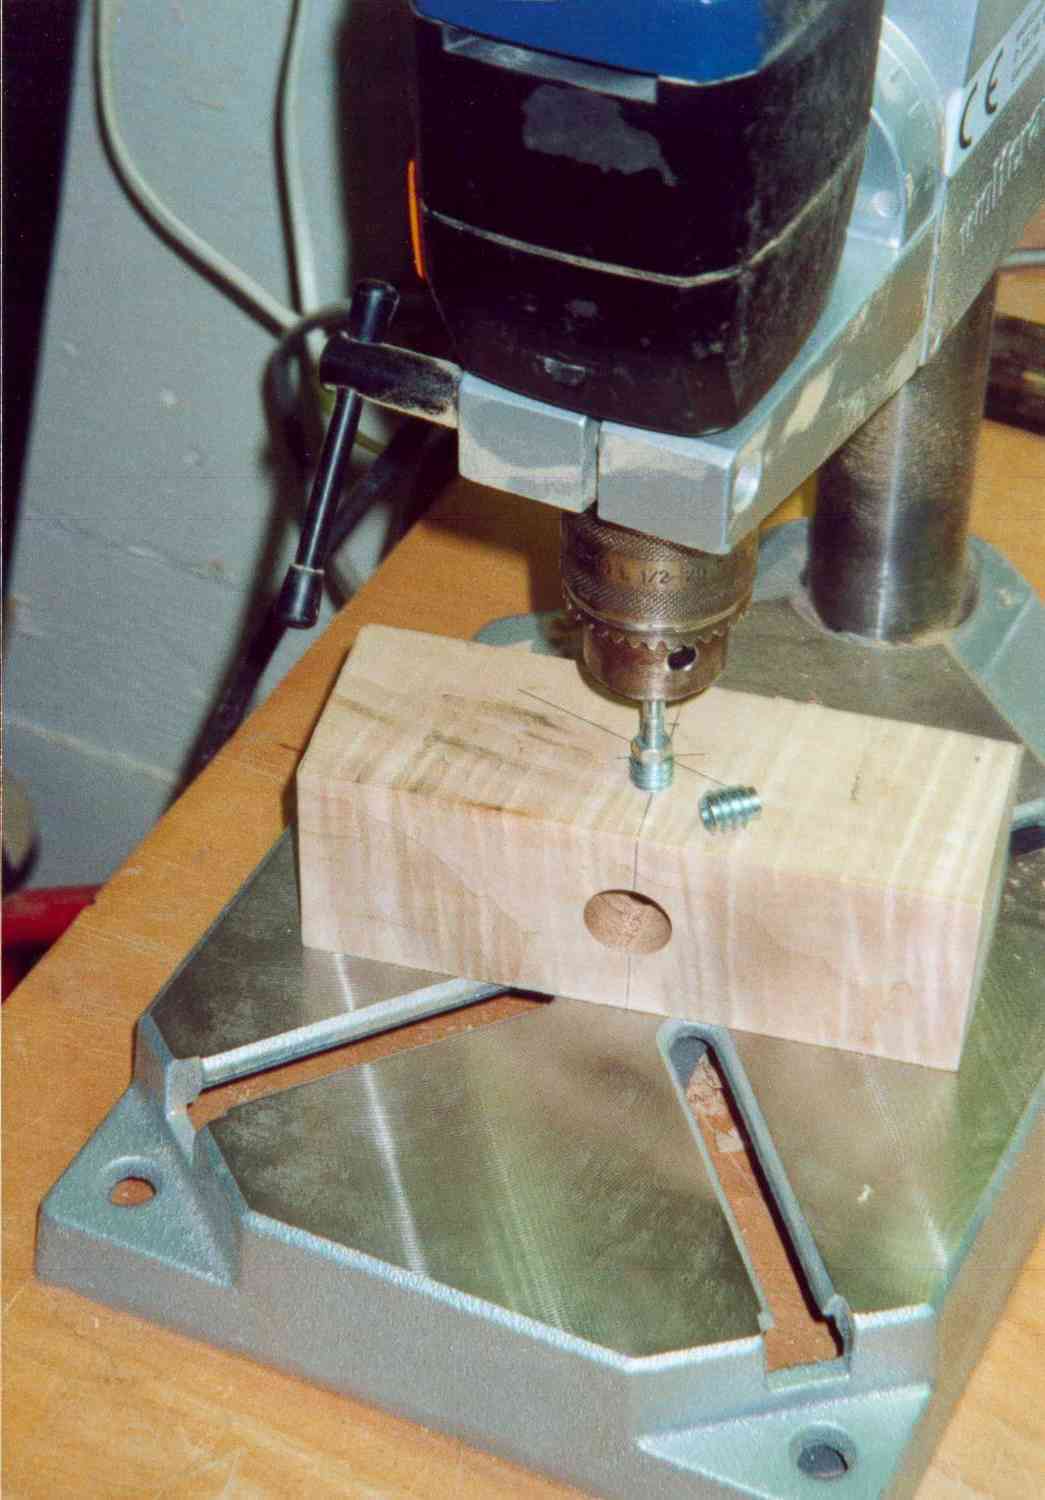
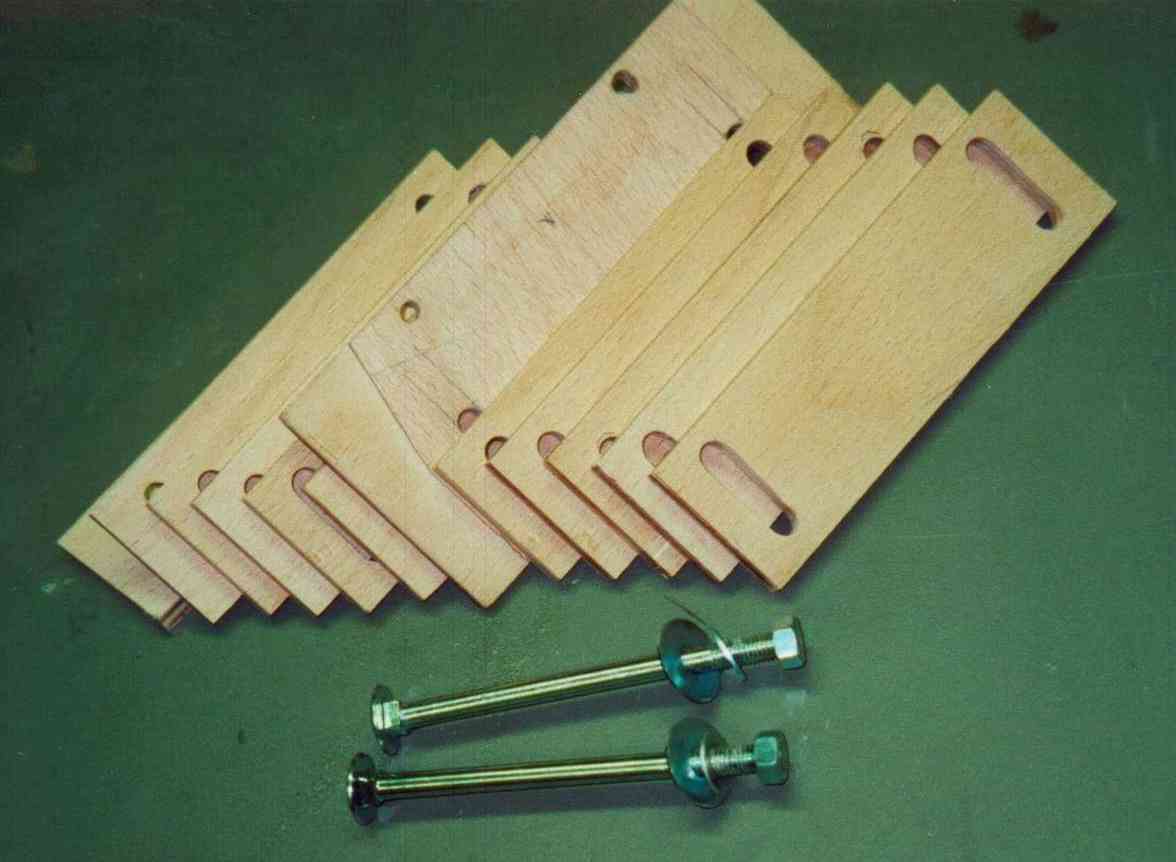
Preparation of the block bottom (shoe)
The block at the bottom holds the moldings and the trapezoidal spindle. I made it from maple. The spindle has a recess for a screw on its underside. I inserted this screw into the wood from the side with a set nut. The advantage of this method is that the metric thread of the screw allows fine adjustment. A groove must be made on the bottom of the block, into which the fastening wood for the moldings is then inserted (I also did this with set nuts). Once you've done that, the bottom corners need to be generously chamfered, you give the moldings more room and can better see what's happening. With the band saw and files, the outer contour is then made and protected with varnish.
 |
 |
 |
Inserting the block bottom (shoe)
The moldings (8-12 pieces) are attached to the block with M8x120 carriage bolts. For the final fastening of the molded parts, the shoe is made to the press and placed on the hollow form, the molded parts to the hollow form and then tighten the carriage bolts. The fastening wood is 8mm thick, the groove in which it runs 6mm. For insertion, I milled two flats and then turned the wood in.
 |
 |
 |
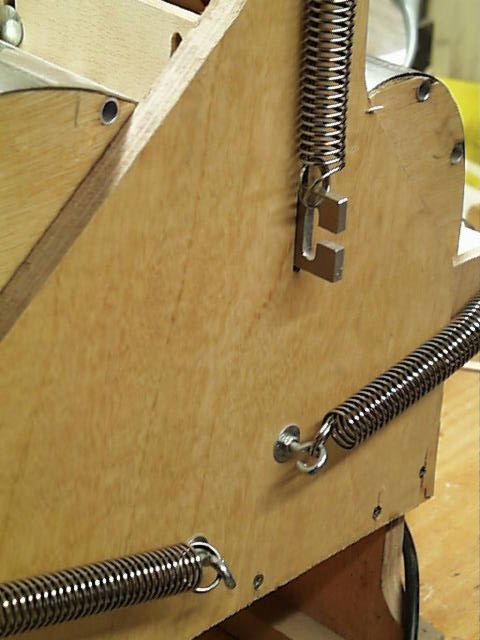
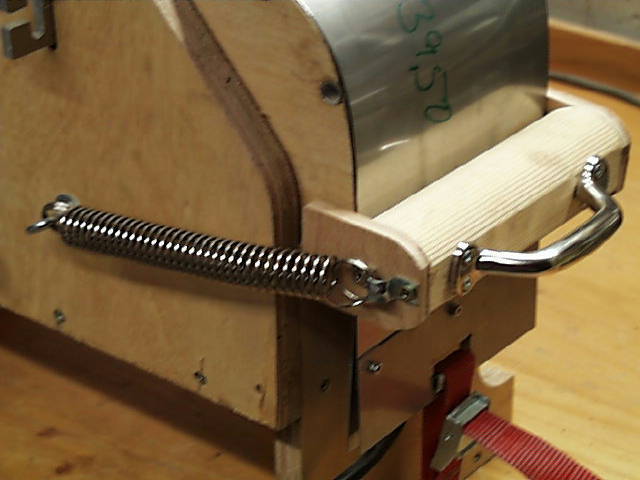
At the flea market I bought an old-fashioned muscle expander as a spring supplier. You need 3x2 pairs for this. With the grinding insert on the Dremel I have deflected the things and then reworked the eyelets by combination pliers. The springs are hung on hooks. I have made quite good experiences with threaded hooks, with a few large washers and two nuts hold the super.
I machined the counterholder with a fretsaw. At the ends it needs only a few slots where you can hang springs.
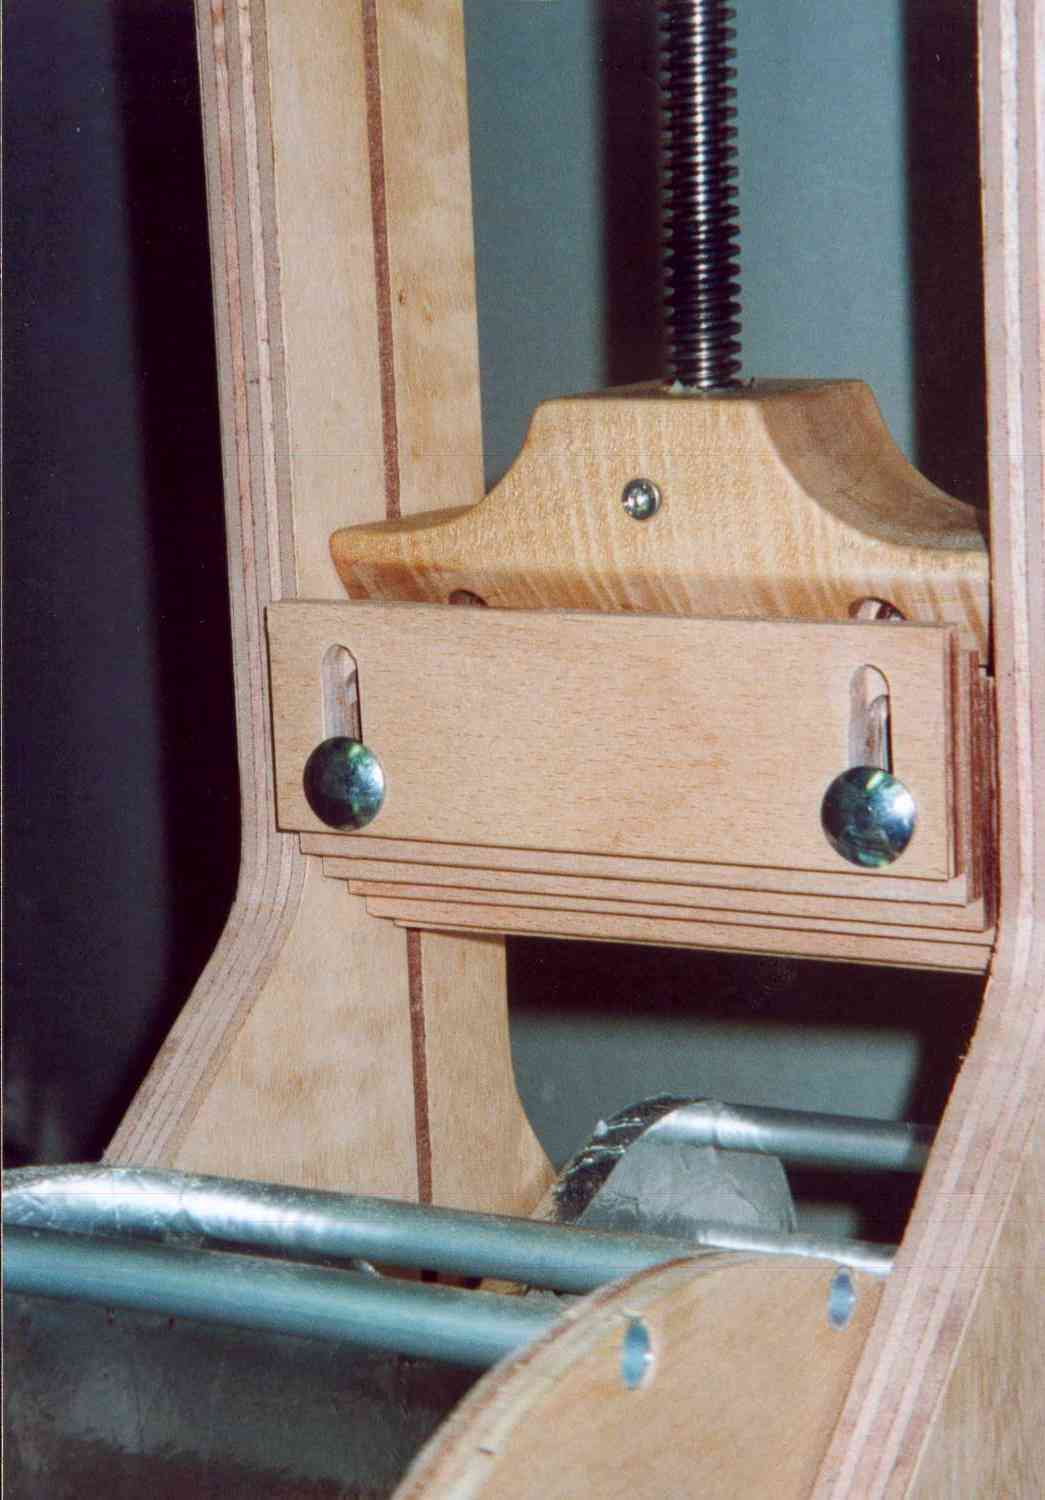
According to the construction plan, you need two clamping shoes, but you can also use three for more difficult shapes. I did not use clamps to unhook the springs from it. A simple handle is enough to move them.
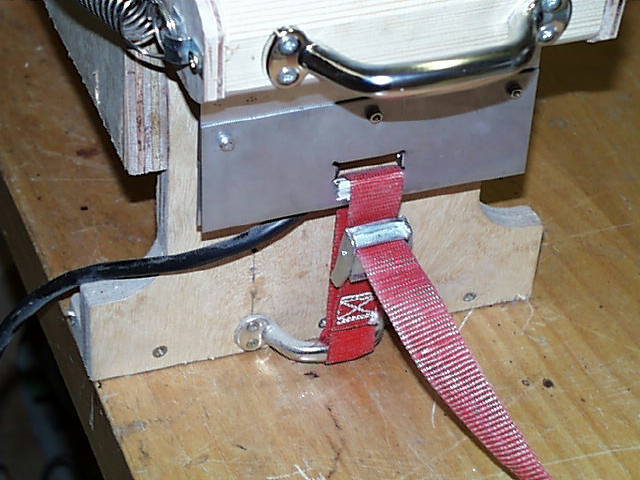
The frames to be bent are placed between two support plates. At the ends you need holes to pass a belt through. I attached two small handles to the feet. A tension belt is placed through the handles and holes to hold the sheet package in place during bending. The pauplan suggests leather straps and bung hooks, but I am also very happy with this design.
Turn the bulbs in and attach the bending machine to the workbench and you're ready to go.
 |
 |
 |
 |
 |
 |
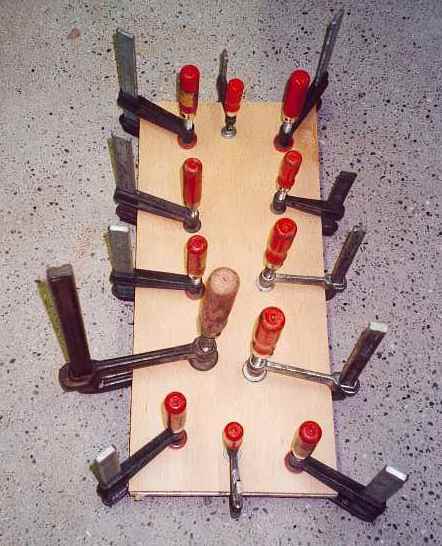
- Use distilled water for bending
- Put baking paper around the frames, as there is a risk of discoloring the wood
- After bending, place the frames in a mold and let them dry out.
- Cover the interior around the lamps with aluminum foil, otherwise it will get charred.
- There is a danger of fire! Urgent attention!
- I now use silicone heating mats. There I get the heat more directly on the wood. Especially with cutaways this has many advantages.

|
Rall Guitars & Tools Hauptstrasse Tel +49 (0) 8803-48856-56 Retail Shop: By appointment only
|
Subscribe our Newsletter By subscribing our newsletter you accept our Privacy Policy and Terms and Conditions. |