Tools, parts and what you need for guitarmaking

-
Tools & Jigs
-
Tools
- Fretting Tools (Base)
- Pliers
- Sanding Blocks
- Brushes
- Files
- Routers
- Routing Templates
- Templates / Straight Edges
- Fretting Templates - Fret Scale Templates
- Clamps
- Knives
- Measuring Tools
- Tool Sets
- Reamer
- Keys, Wrenches
- Drill Jigs
- Saws
- Drill Bits
- Scrapers
- Bending Irons
- Other Tools
- Fret Hammer
- Fret Pressing
- Fretboard Protector
- Fret Bender & Tang Nipper
- ... More
- Jigs for Luthiers
-
Tools
-
Hardware & Parts
- Necks & Bodies
- Tuners
-
Hardware / Parts
- Truss Rods
- Carbon / Titan Reinforcement
- Trussrod Nuts
- Washer for truss rods
- Bridge Pins
- End Pins
- Bridges & Tailpieces E-Guitar
- Bridges & Tailpieces
- Covers
- Pickguards / Scratch Plates
- Strap Locks
- Bridge Accessories / Spare Parts
- Screws, Nuts, Washers
- Neck Attachement
- String-Ferrules
- Jack plates
- Control Plates
- String Retainer / String Trees
- knobs (pots/switch)
- Relic Parts
- ... More
- Nuts & Saddles
- Fret Wire
- Pickups & Electronics
- Materials & Supplies
- How-to
- Guitar Making
Shop Startpage Guitar Making Luthiery 000-Standard Planning
Planning the Project
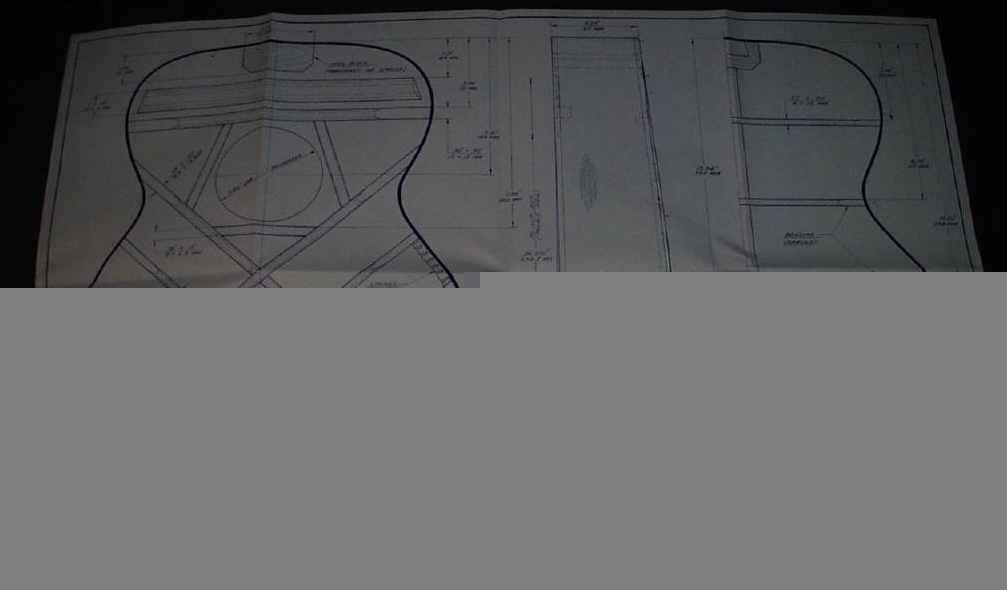
For me personally, besides the varnish, planning is the most important thing in building a guitar. Both the one and the other can completely destroy a whole work. Of course you can't plan or foresee everything, but the worst mistakes can be avoided absolutely by simple construction. Popular mistakes are, for example, that the string spacing on the bridge from the standard bore leaves too little space on the side of the fretboard, or that the fretboard makes a neat bend on the top after the body transition because the top curvature does not match the neck angle. It is therefore best to draw both the side view (this is the view from the side, so no strings!) and the top view on a scale of 1:1 and then take the measurements from this plan. But I have made it much easier for myself. Since this guitar has been copied several hundred thousand times, there is of course someone who has measured the thing and is now selling the plan. You can get these plans for example at Elderly Instruments or Luthiers Mercantile in the USA for 10US$. You need two plans, one to look at and hang up, the other one to mount on 8mm MDF boards to make stencils (buy 1x, copy 1x?).
 |
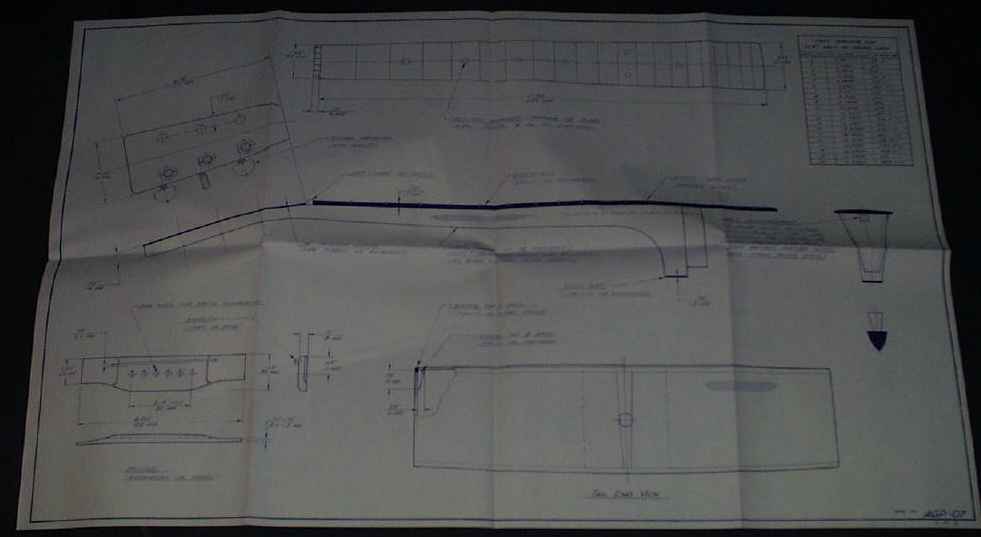 |
Now that it is clear what size the guitar is, the measurements for the material can be taken from the plan:
| Designation | Quantity | Dimensions [mm] | Material |
| Ceiling material | 1x | 3x550x430 | Bavarian hazel spruce |
| Back / Sides | 2x | 2,5x120x870 | Rosewood |
| Fretboard | 1x | 6x60x510 | Rosewood |
| Neck | 1x | 100x75x590 | Mahogany, 2-fold, mirrored |
| Bridge | 1x | 11x48x175 | Rosewood |
| Bracing | 1x | 20x50x510 | Spruce |
| Fret | 8x | 5x15x400 | Slotted Mahogany |
| Neck block | 1x | 95x70x33 | Spruce |
| End block | 1x | 120x80x19 | Spruce |
| Soundhole rosette | 1x | - | black / white with abalone |
| Binding | - | 1,5x7x800 | Herringbone / ABS vintage white |
| Floor ornaments | 1x | - | Zipper Stripe |
| Tuners | 1x | 3 L / R | Gotoh, Kluson style |
| Paint | - | - | Filler Water-based, high-gloss nitrocellulose lacquer |
| Glue | - | - | White glue, Speedbond |
| Fret Wire | - | - | Dunlop Medium Wire |
| Inlays Fretboard | - | D45 style | Abalone |
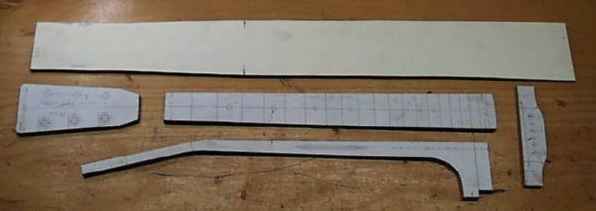
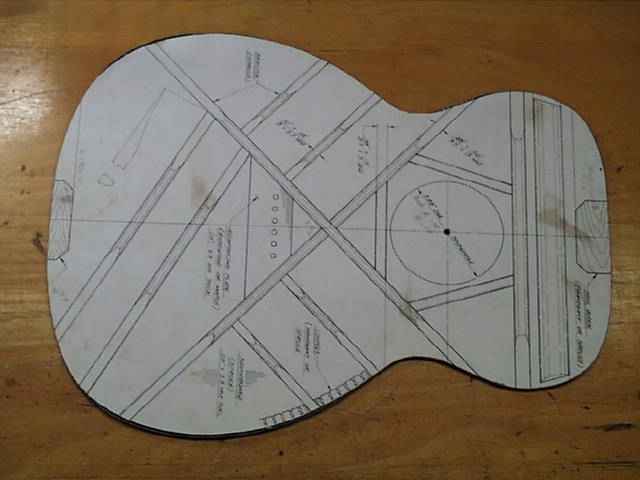
I bought an 8mm thick MDF board and cut out the top, neck, fingerboard and bridge from the plan with scissors. Then I glued the pieces of paper with spray glue (white glue or similar has a lot of water in it and distorts the plan). On the band saw I cut very precisely along the outline and with file and sandpaper I worked my way to the desired size.
 |
 |
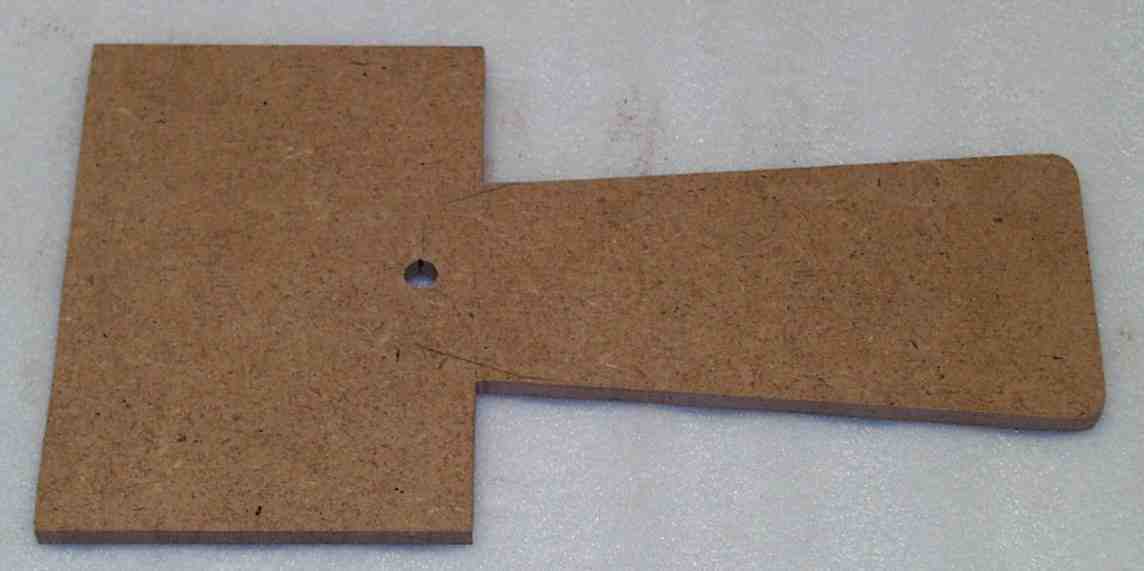
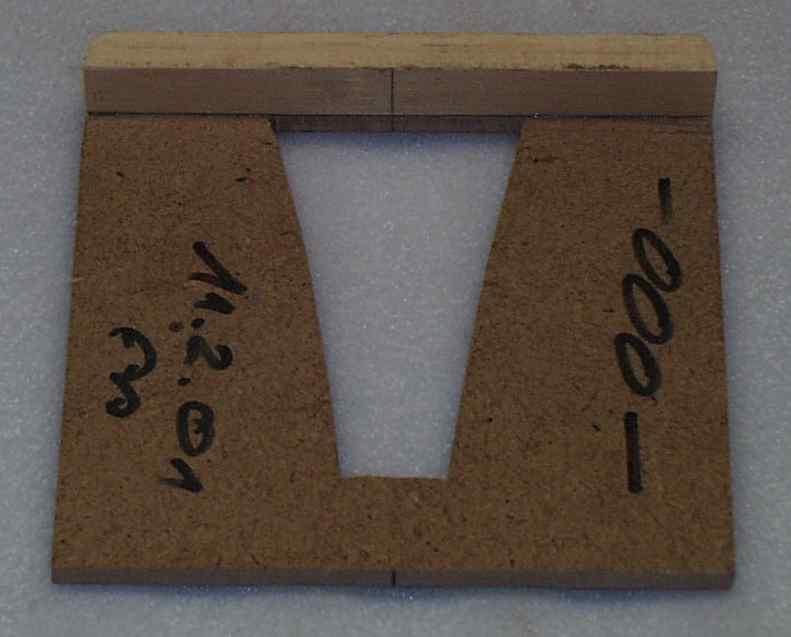
In addition to the templates described above, I made another one for the head plate shape, the neck foot, the bridge.
 |
 |
 |
|
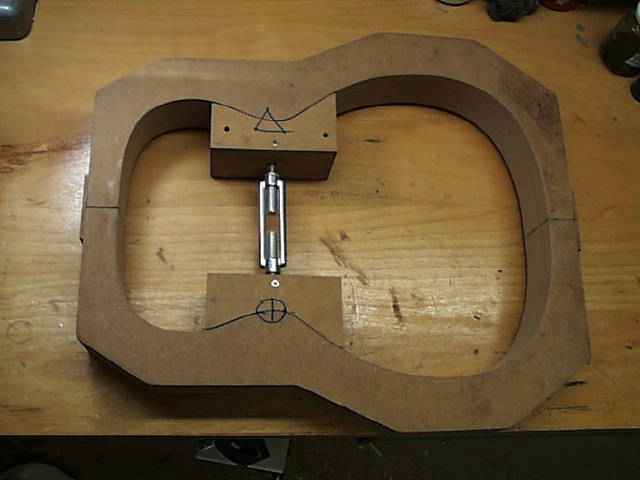
A little more laborious is the production of the frame form. You need 28mm thick MDF boards. On one of these boards the outer contour of one half of the guitar is drawn and a step shape is drawn on the opposite side to facilitate the positioning of the ferrules. If one half of the board is cut and processed and then used as a starting template with the router, the rest of the guitar half can be copied with this form (6 pieces in total). To position the starting form on the board, you put two dowels through Ø10mm holes in both MDF boards. With these holes the copied boards can be glued together without much rework. The mould halves are then screwed together using small boards. To make sure that the frames fit at the waist, the frames are clamped with two counter moulds, held by a strong rope tensioner.

|
Rall Guitars & Tools Hauptstrasse Tel +49 (0) 8803-48856-56 Retail Shop: By appointment only
|
Subscribe our Newsletter By subscribing our newsletter you accept our Privacy Policy and Terms and Conditions. |